


How to Style Artwork Throughout Your Home
Injecting an extra dose of personality starts on the walls. Here, our top ten favorite ways to style artwork throughout your home.
27 December 2022 -
Finding the perfect piece of artwork for your home can be quite daunting. Does the scale fit the space? Does the palette suit the furnishings? Does the subject amplify or distract from the vibe of the room? And that’s just the functionality questions. There’s still the big one, which is, “does this artwork speak to me?” What’s on your walls represents your character and really works to set the mood in the home, so you want to make sure you pick out pieces that are just right for who you are and what feeling you want your home to encapsulate.
Artwork adds a lot of personality to any space, no matter the size, and here at Studio McGee it’s always part of the equation when designing for clients. Sometimes it’s something our client already has, and we design the rest of the room around it. Other times, we’re sourcing the perfect piece of art to tie the finished room together. Whether adding color, texture, or expression, or doing it in the beginning or end, the right piece of artwork can bring an entire look to life.
It doesn’t matter if it’s an unframed canvas, sketched art, family photographs, or vintage movie posters, mixing up how you display your art pieces in your home is a quick way to add interest and contrast to your space. The options are numerous—you can lean it, you can hang it, you can group it—but we’ve gathered our top ten favorite ways to style artwork throughout your home.
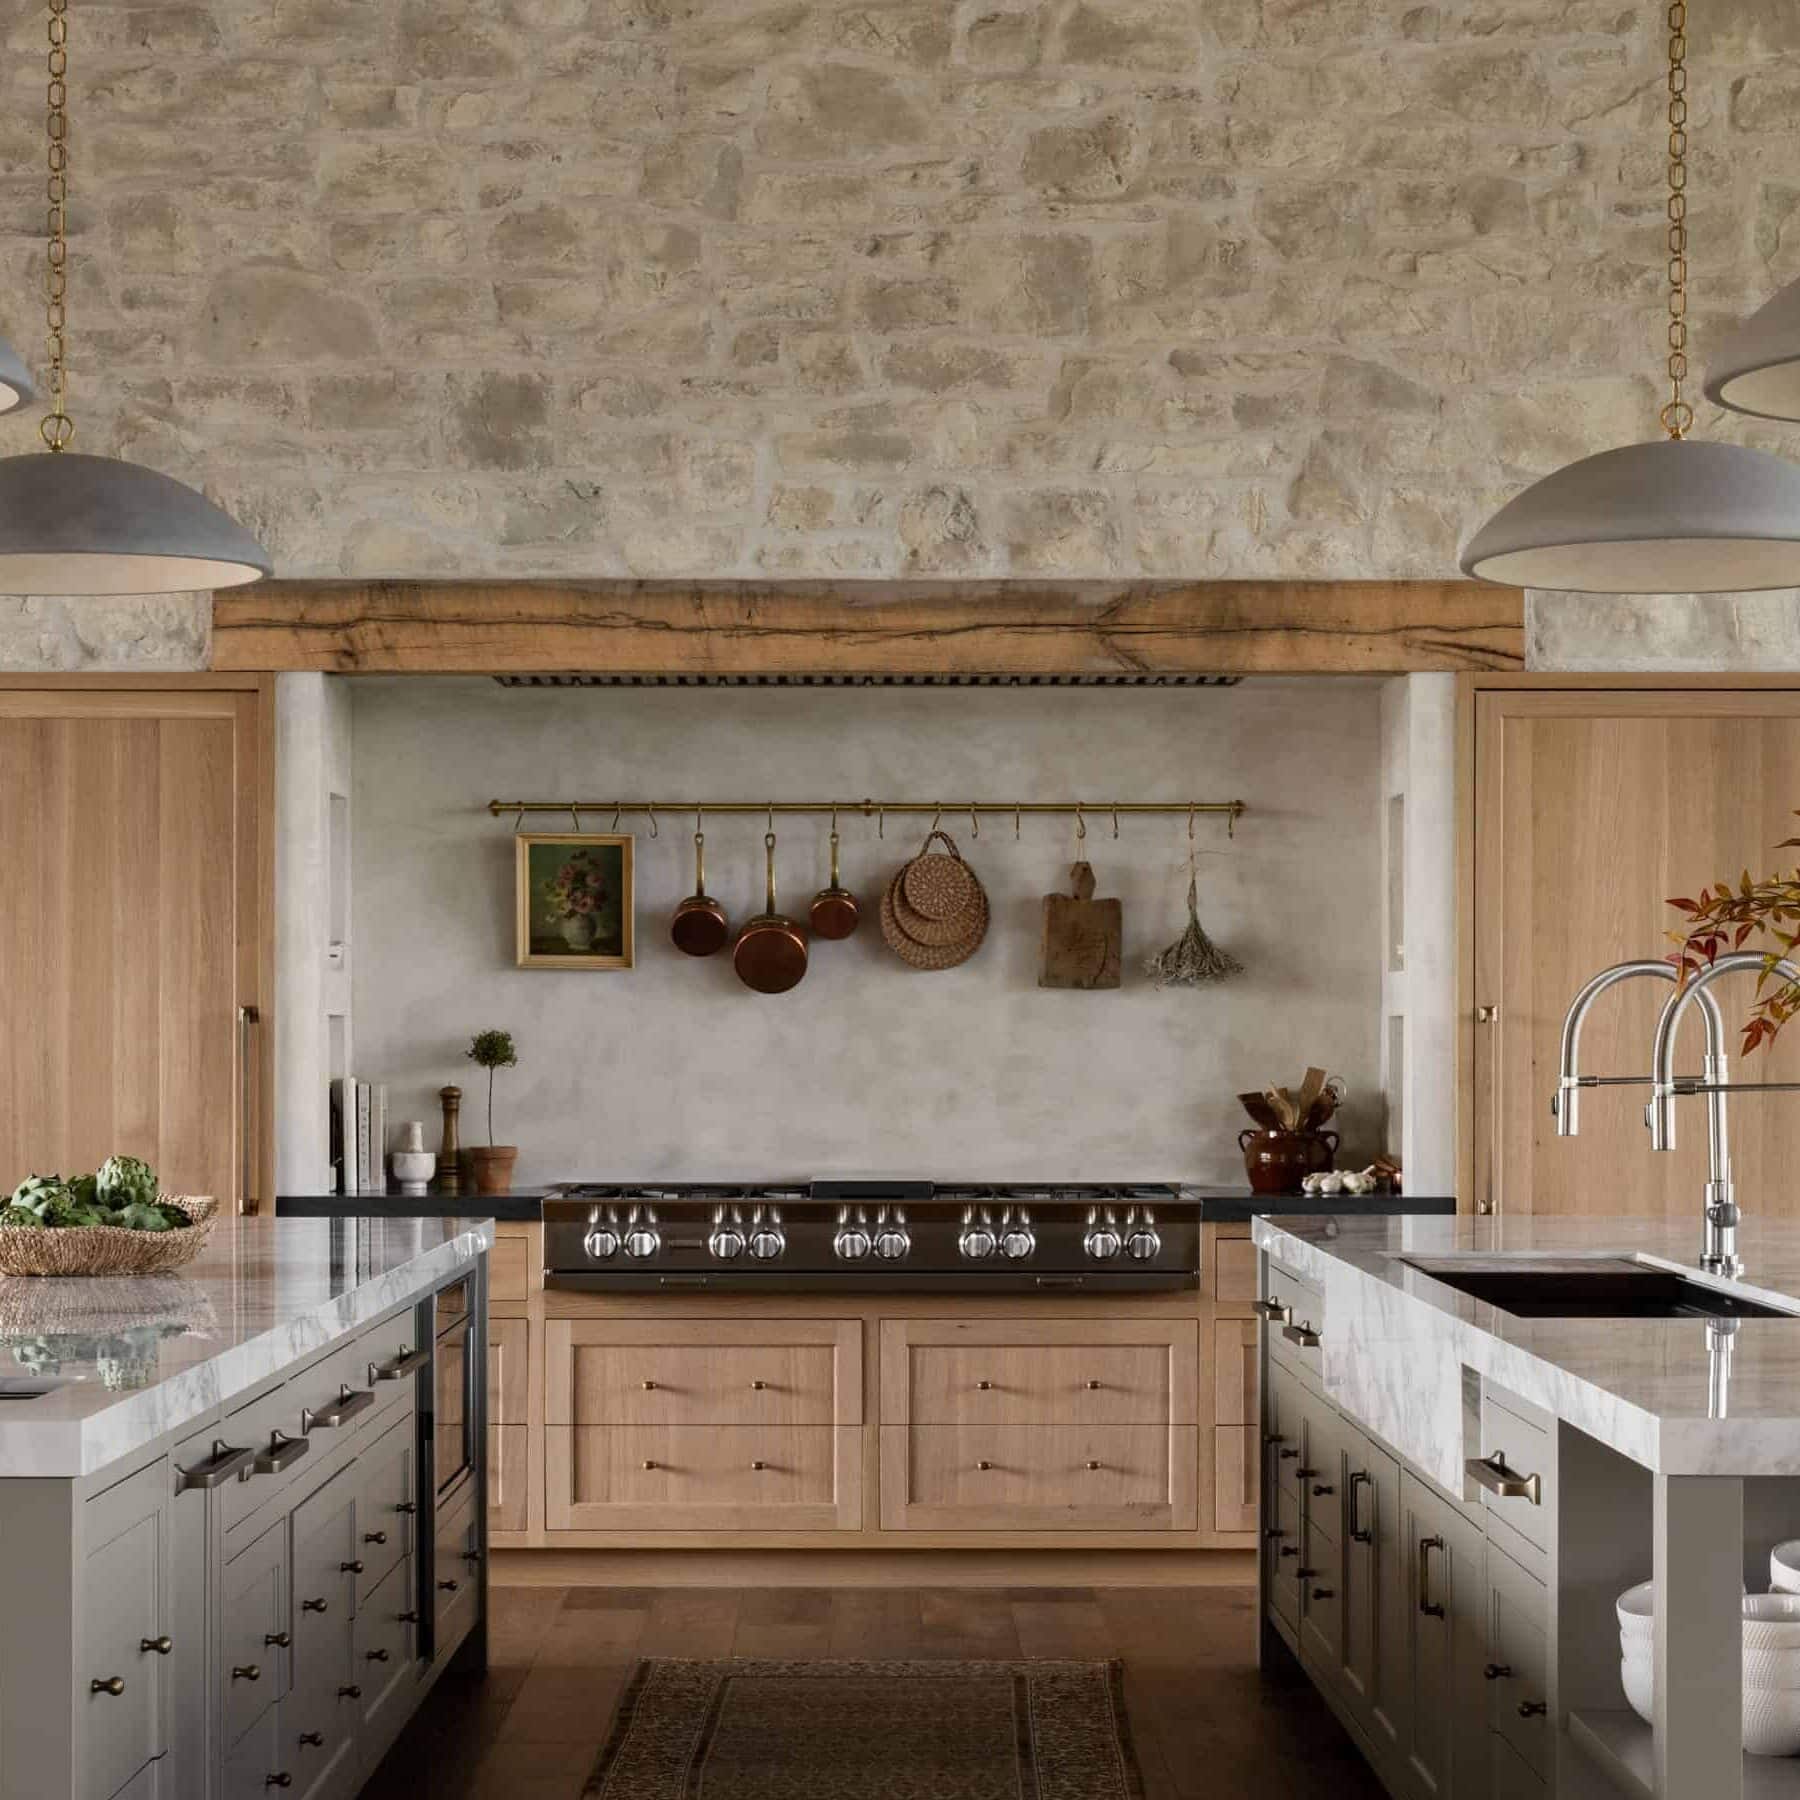
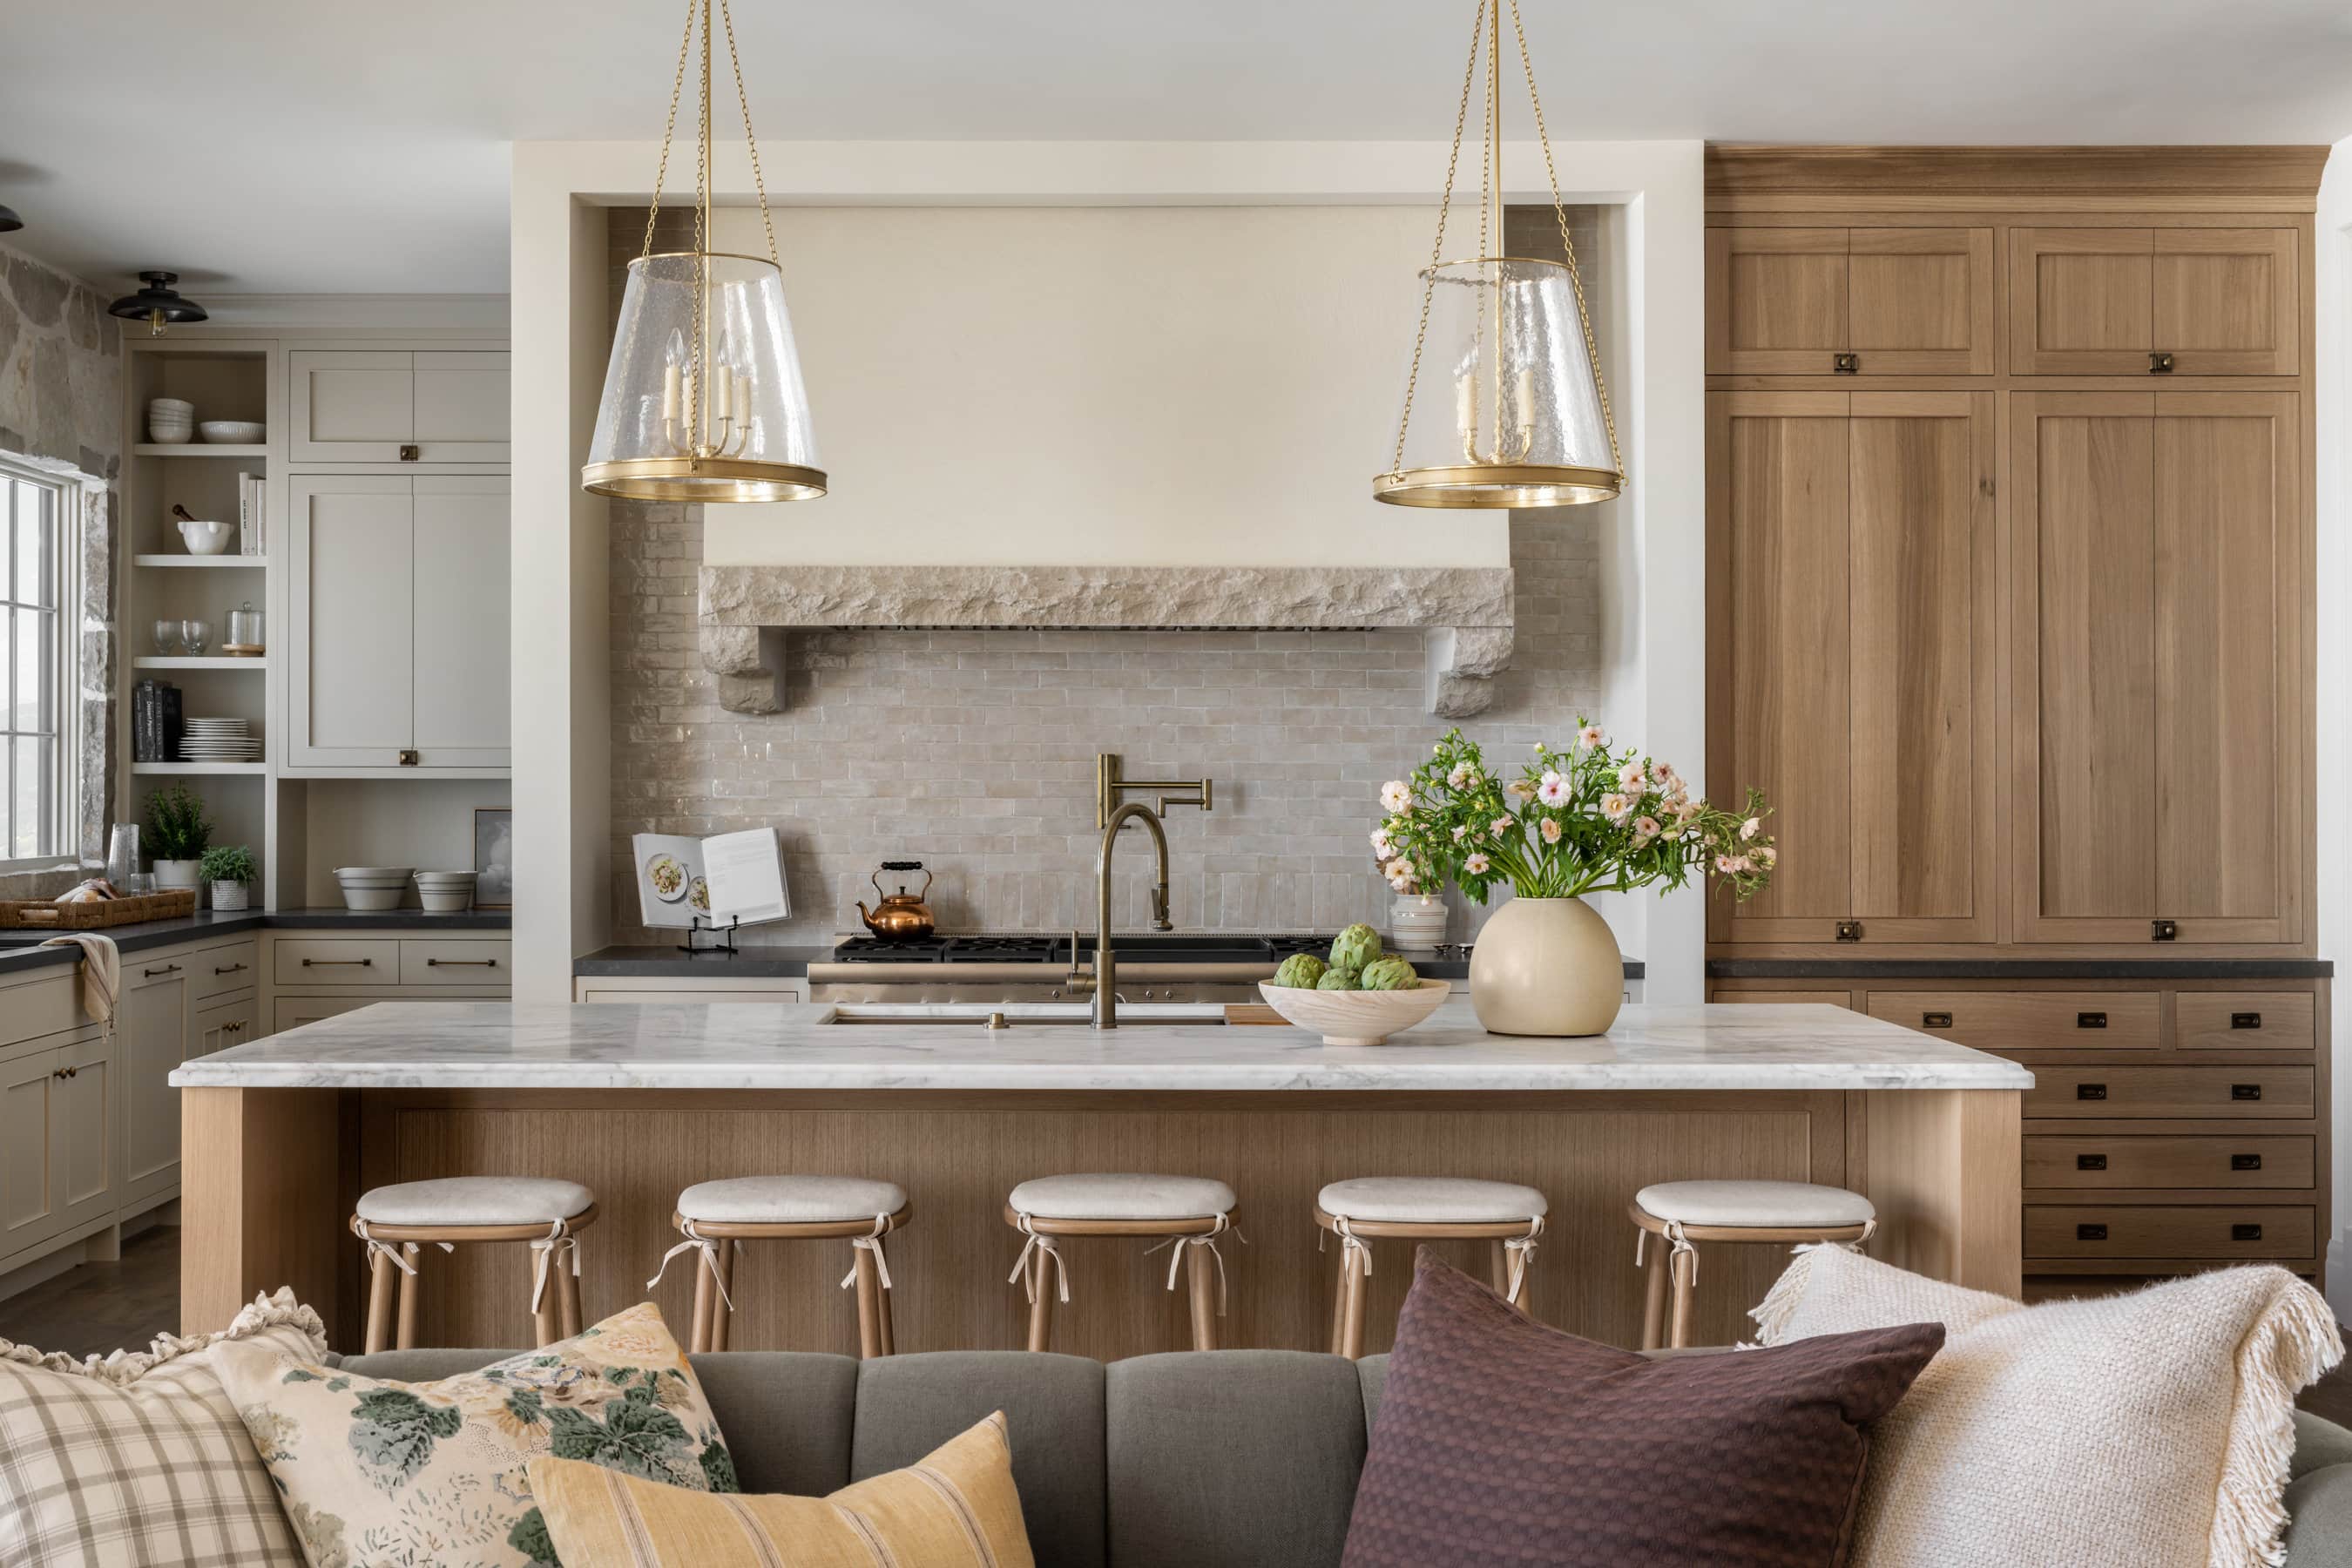
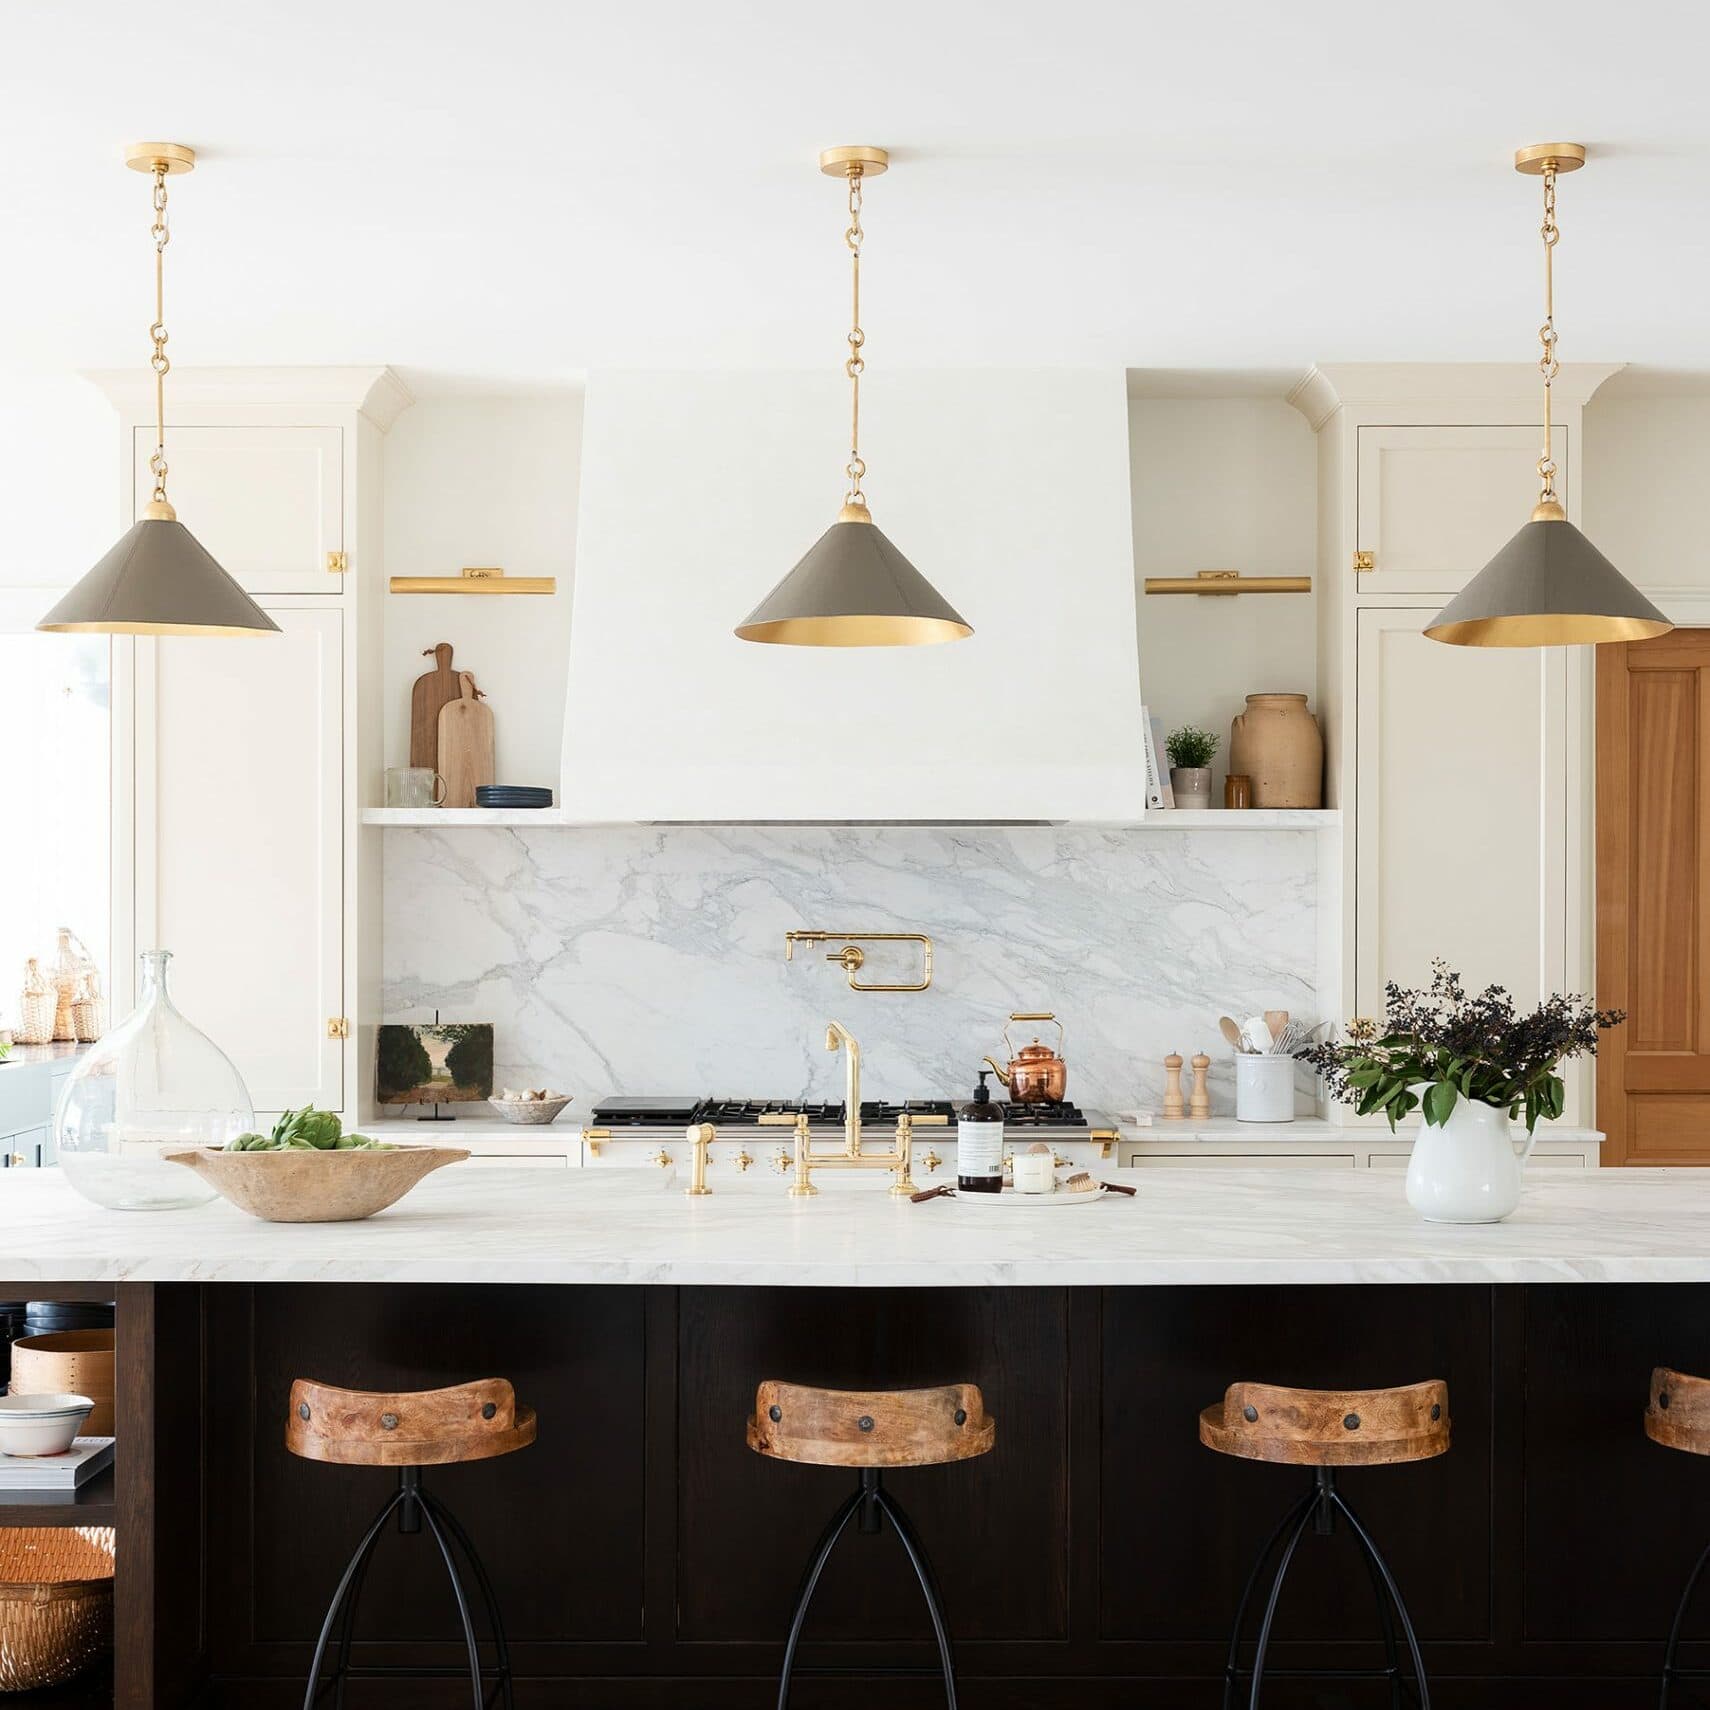
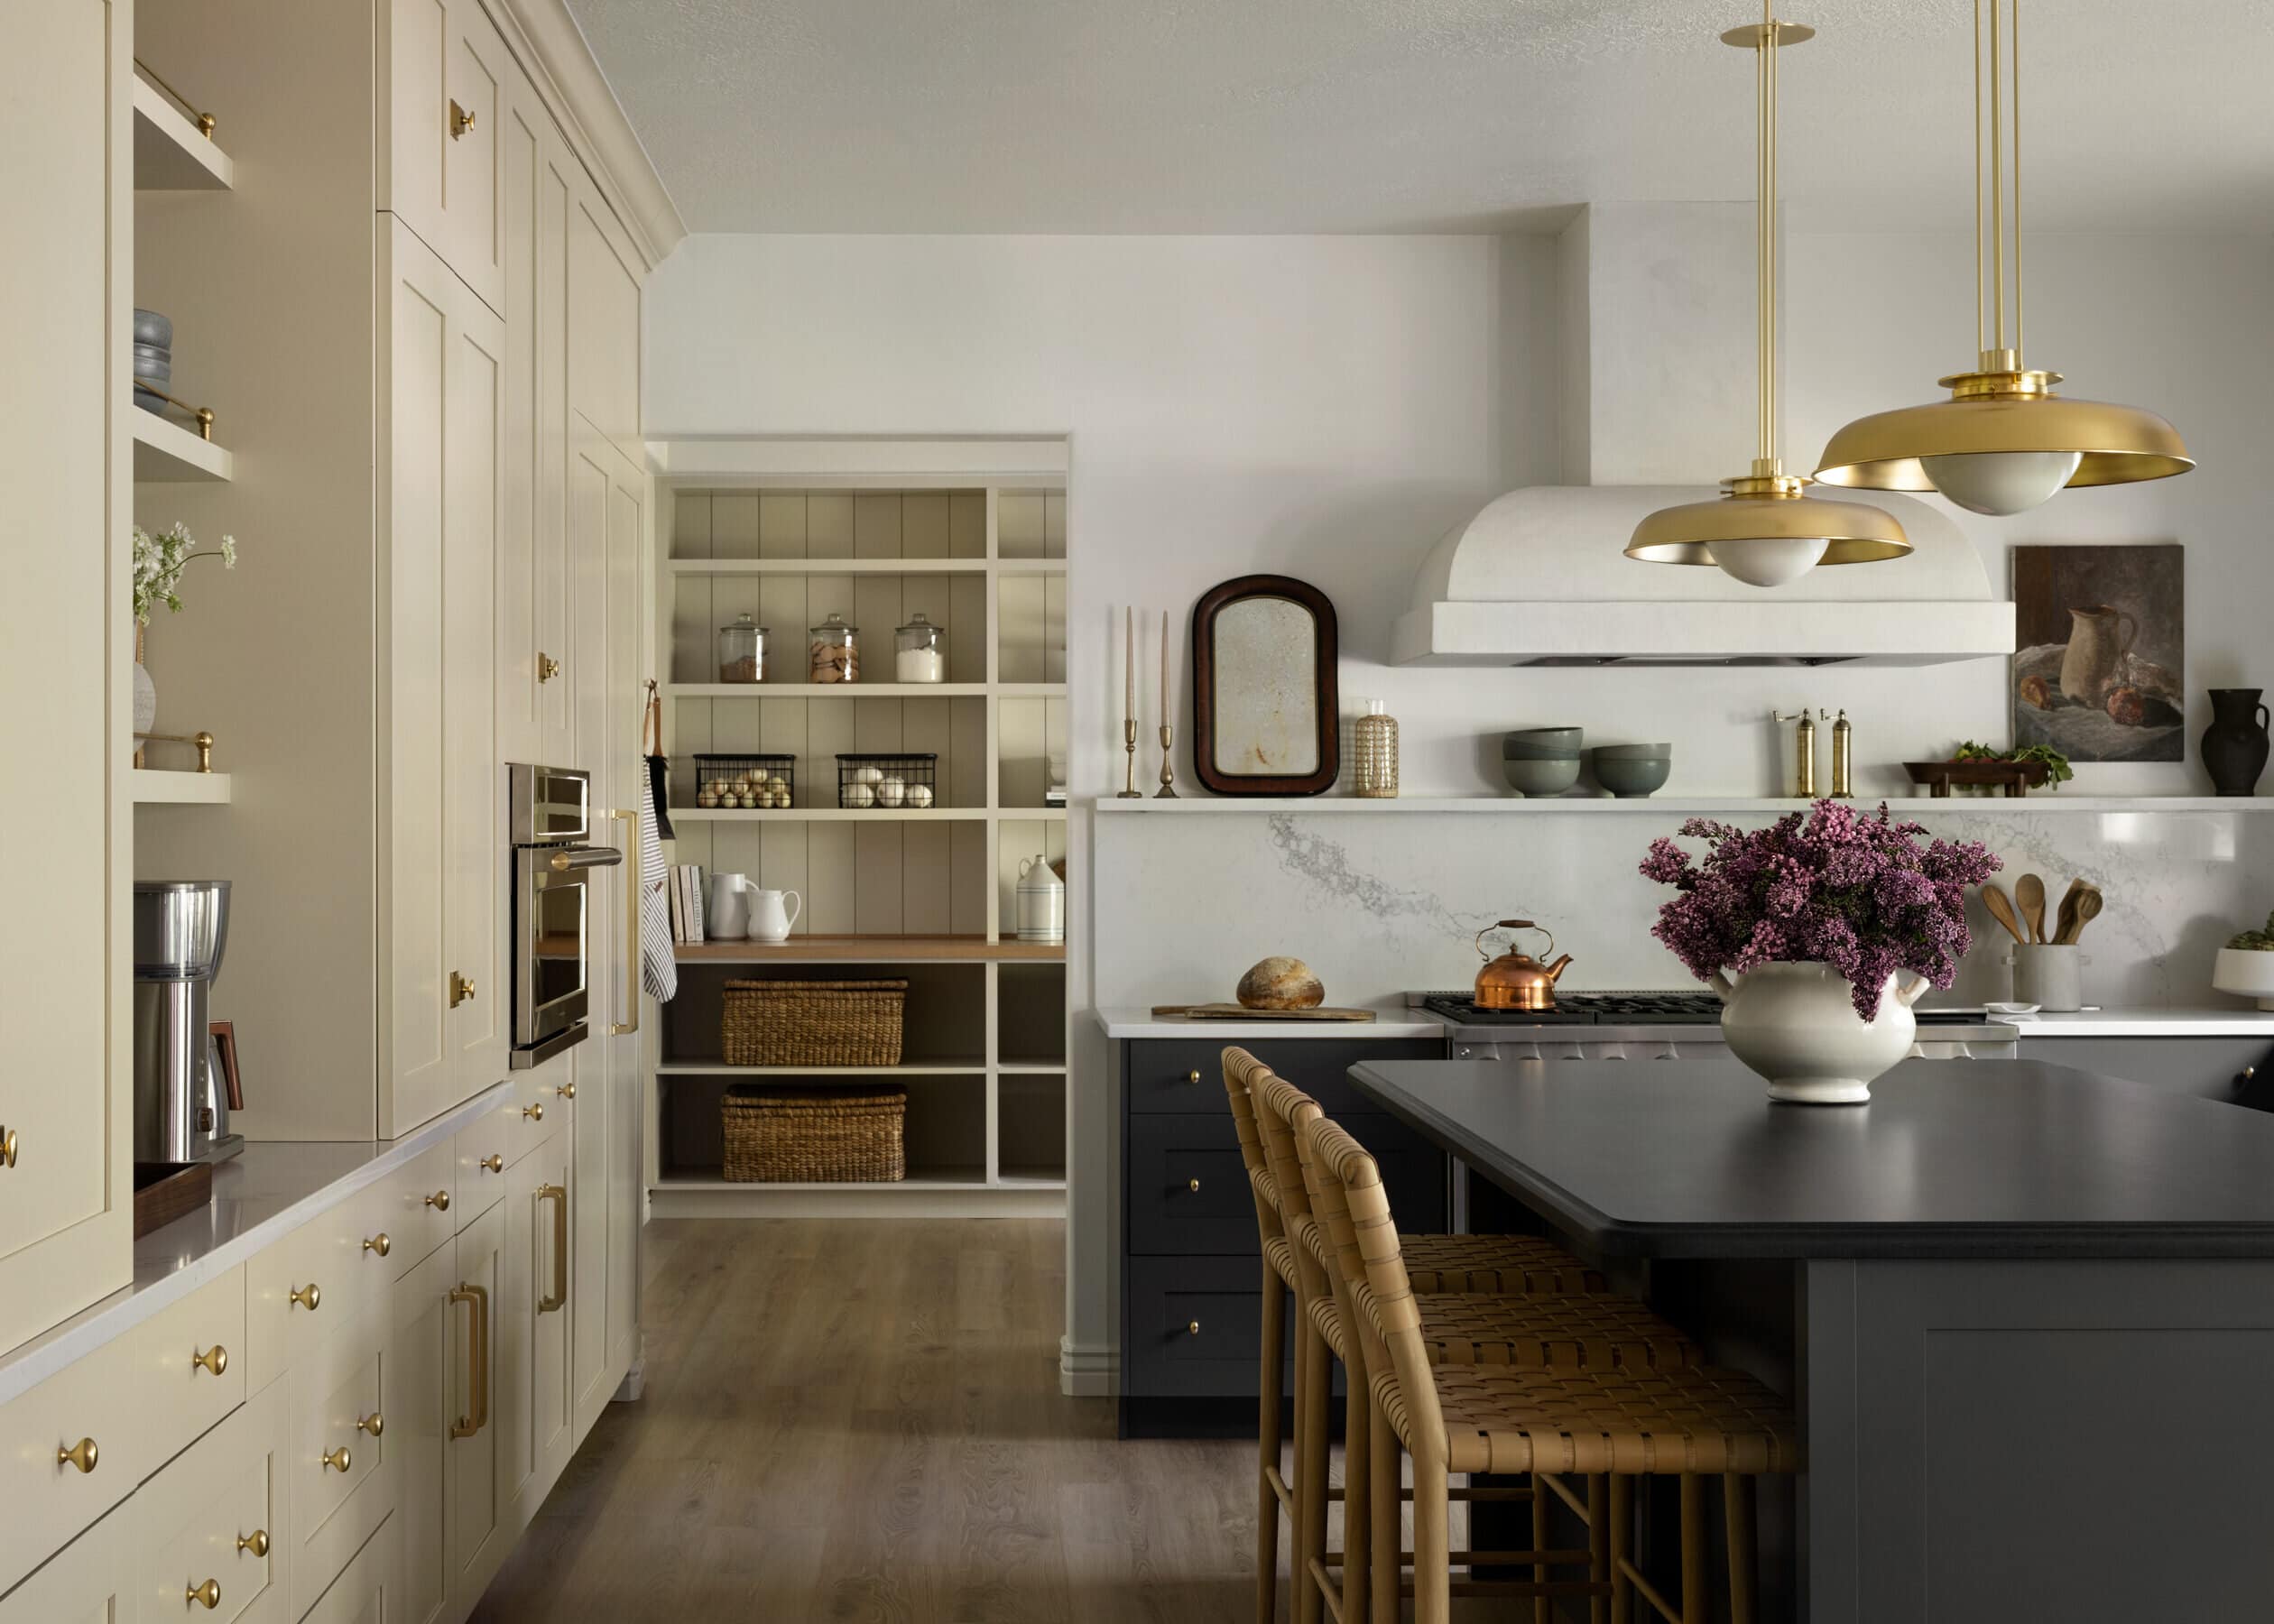
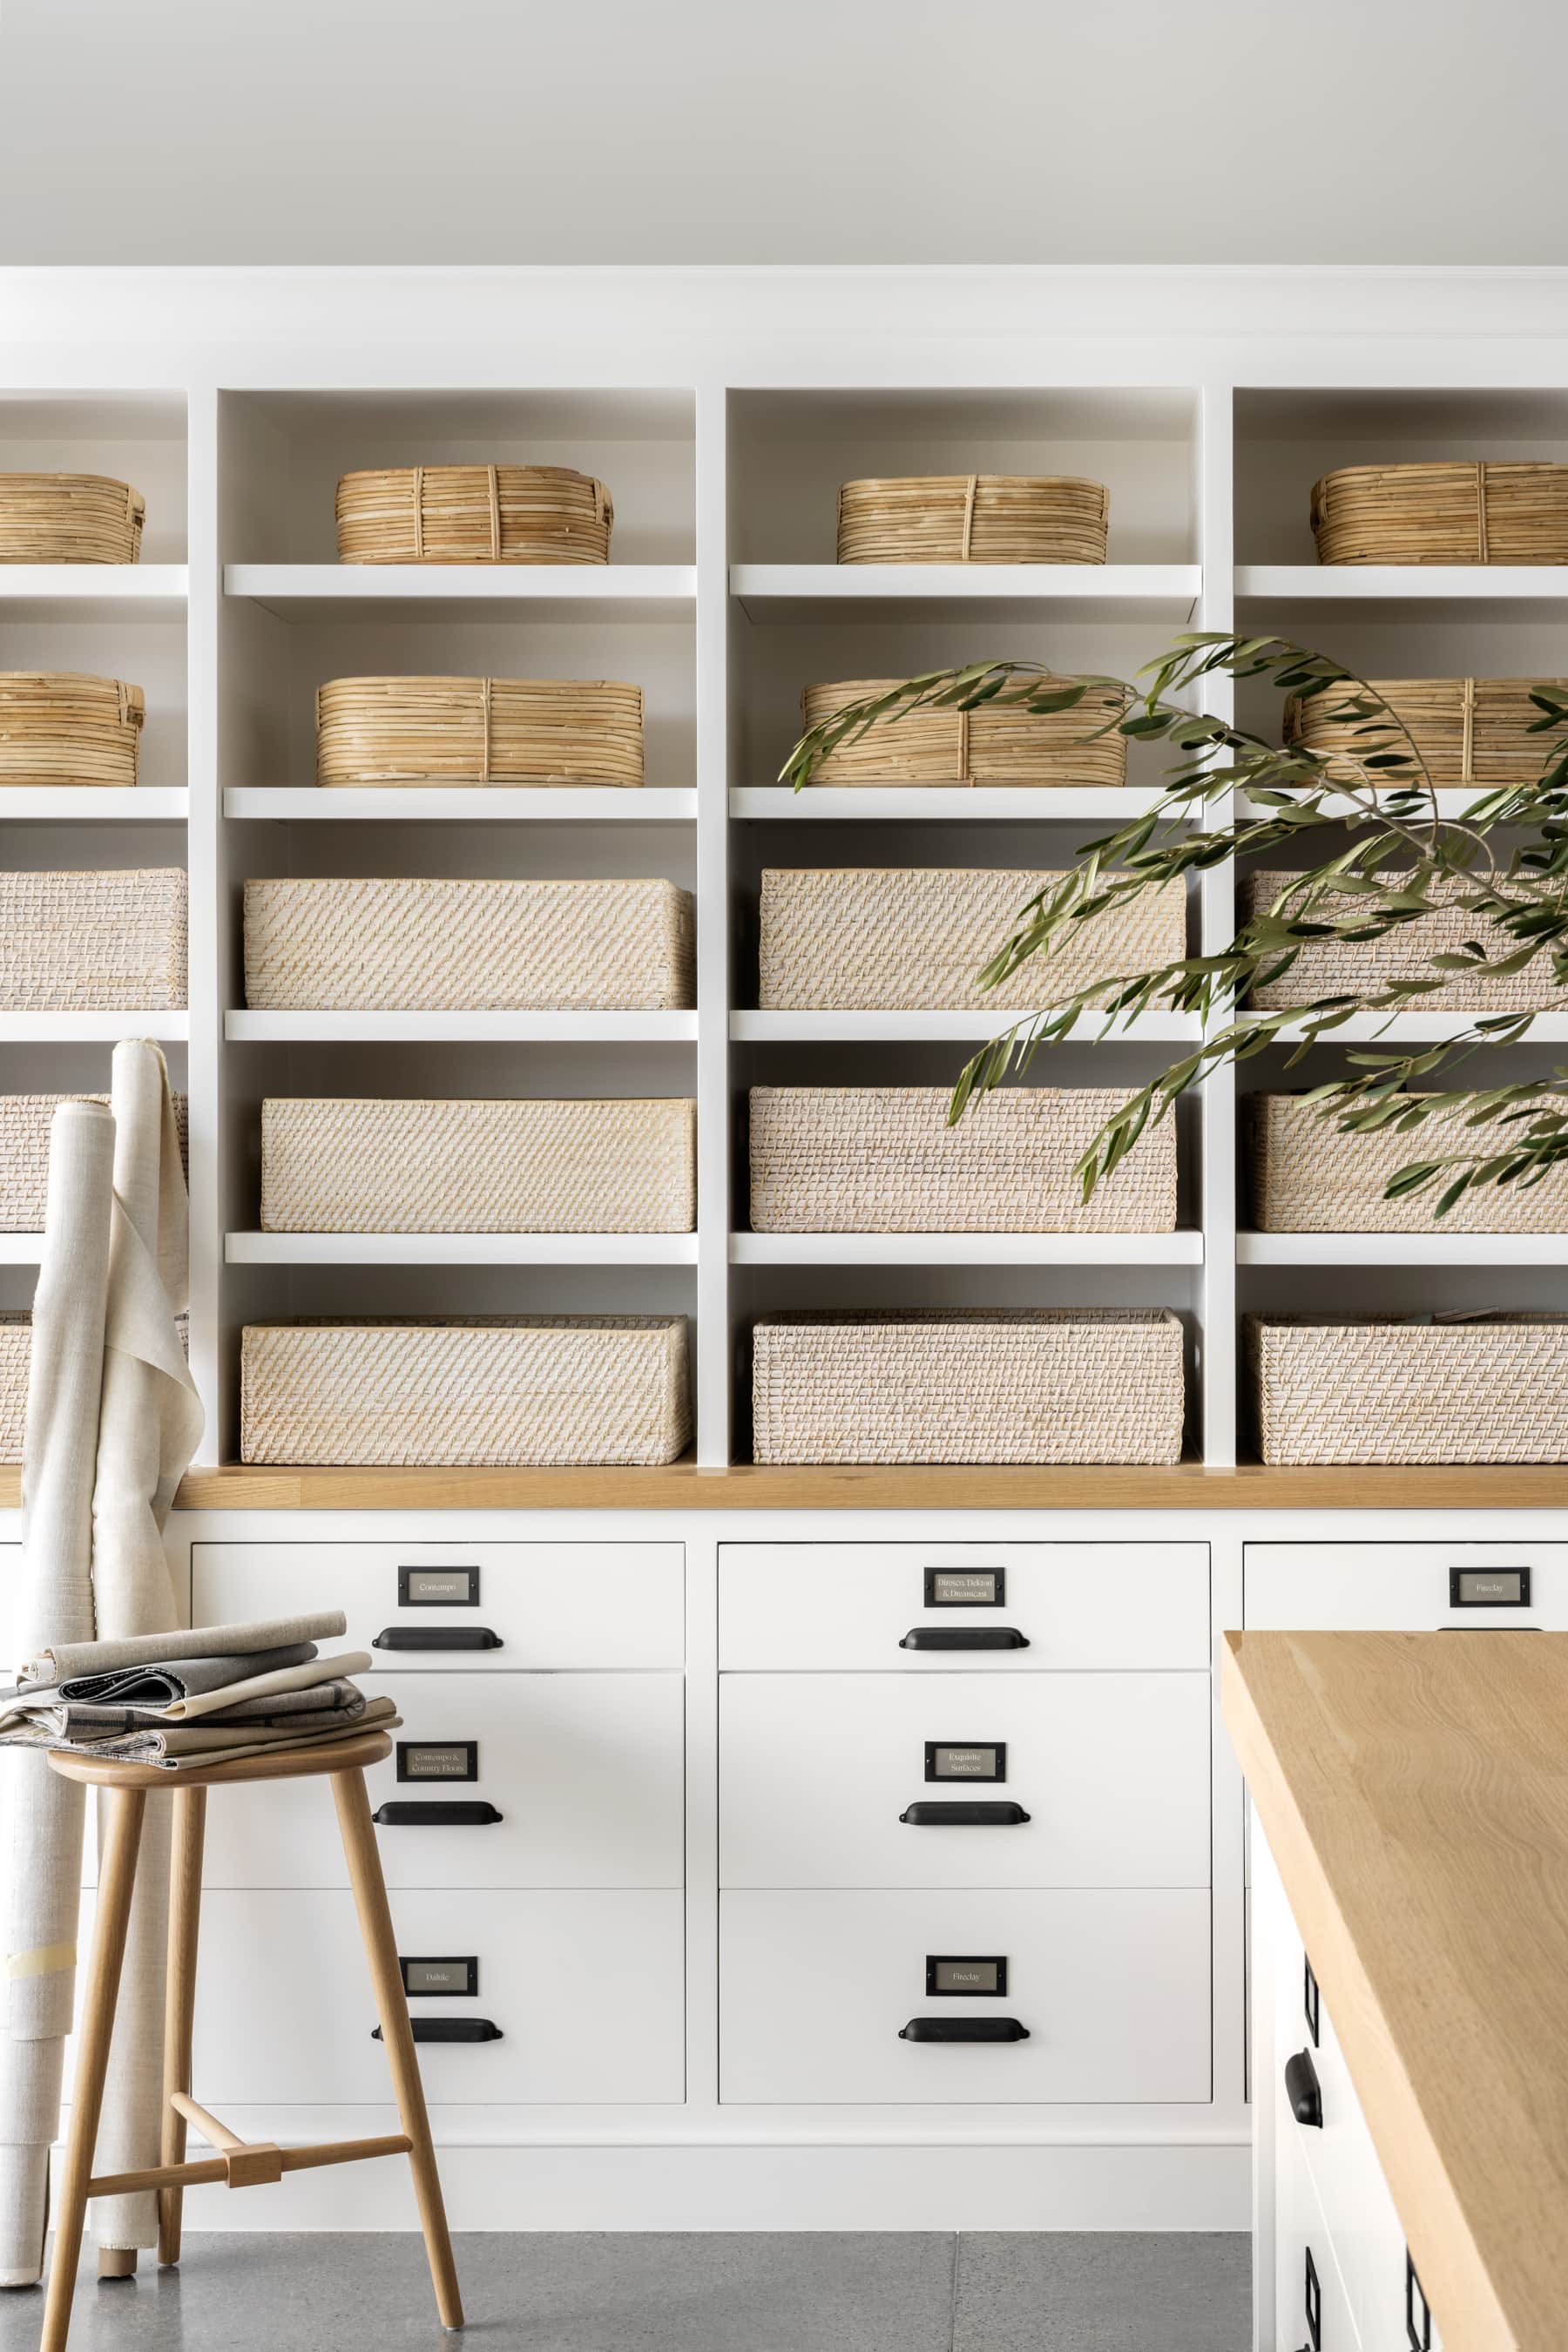
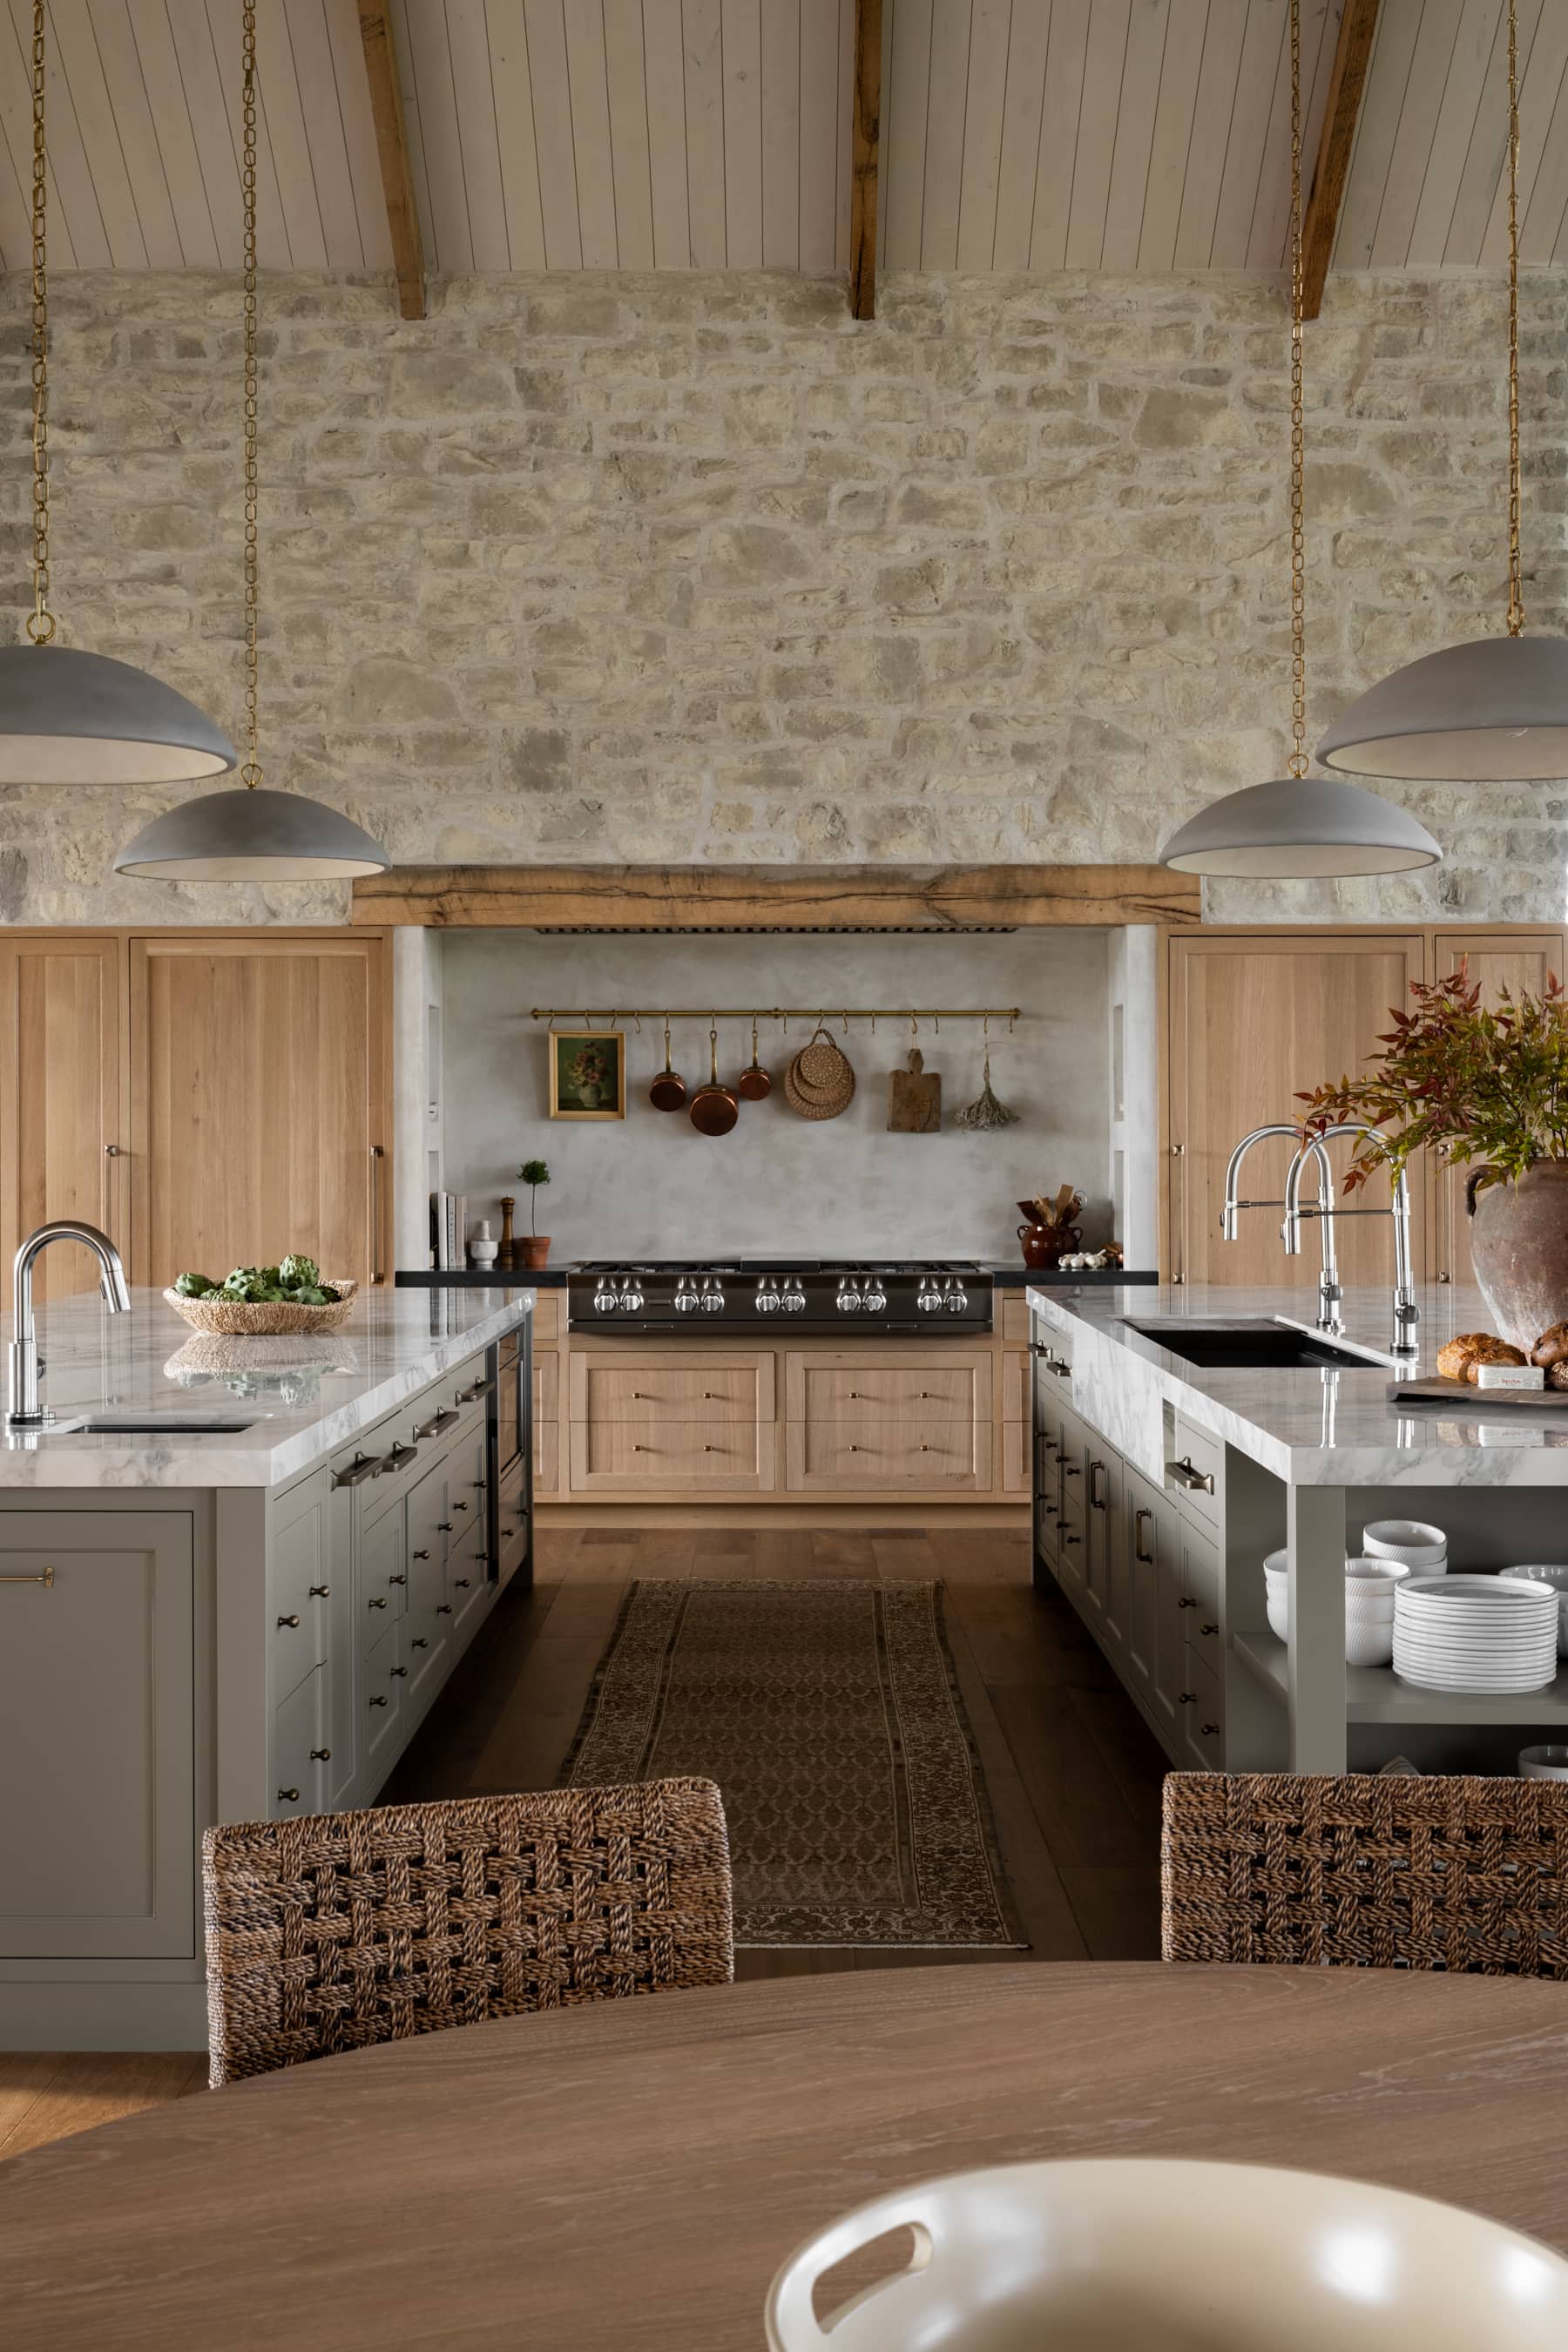
Style No. 01 | On Kitchen Shelving
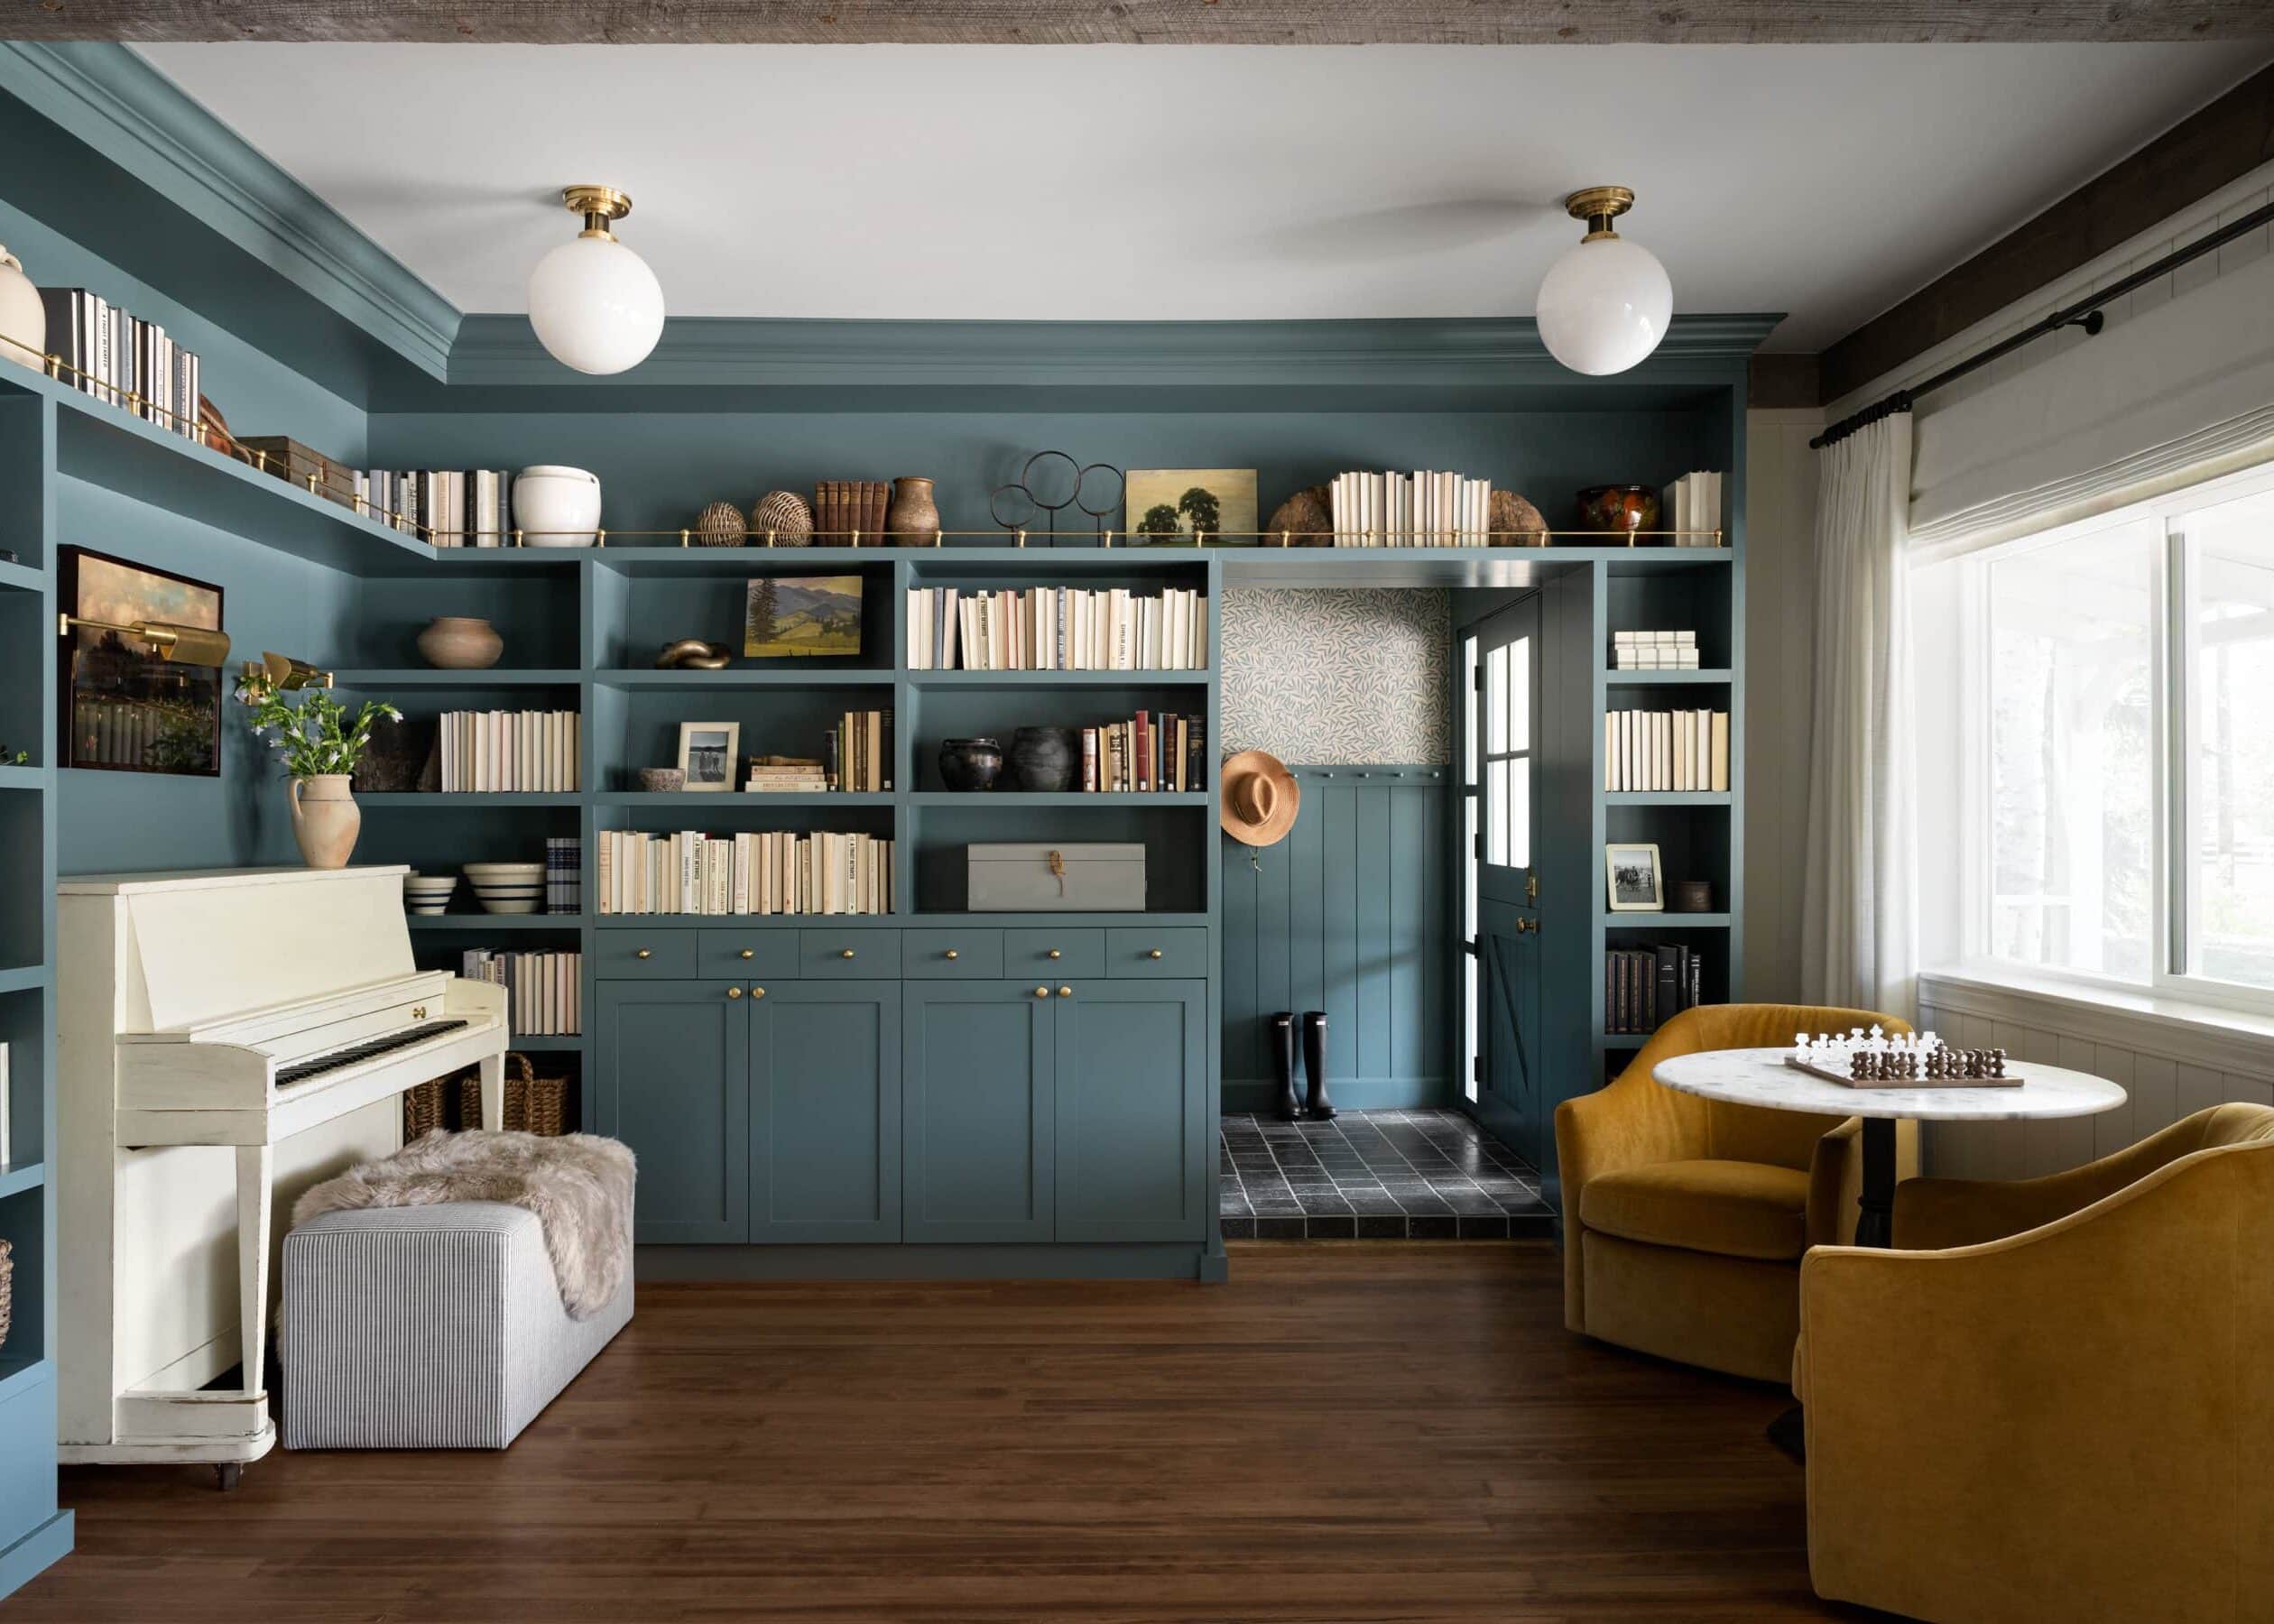
Style No. 03 | Layered on a Bookcase
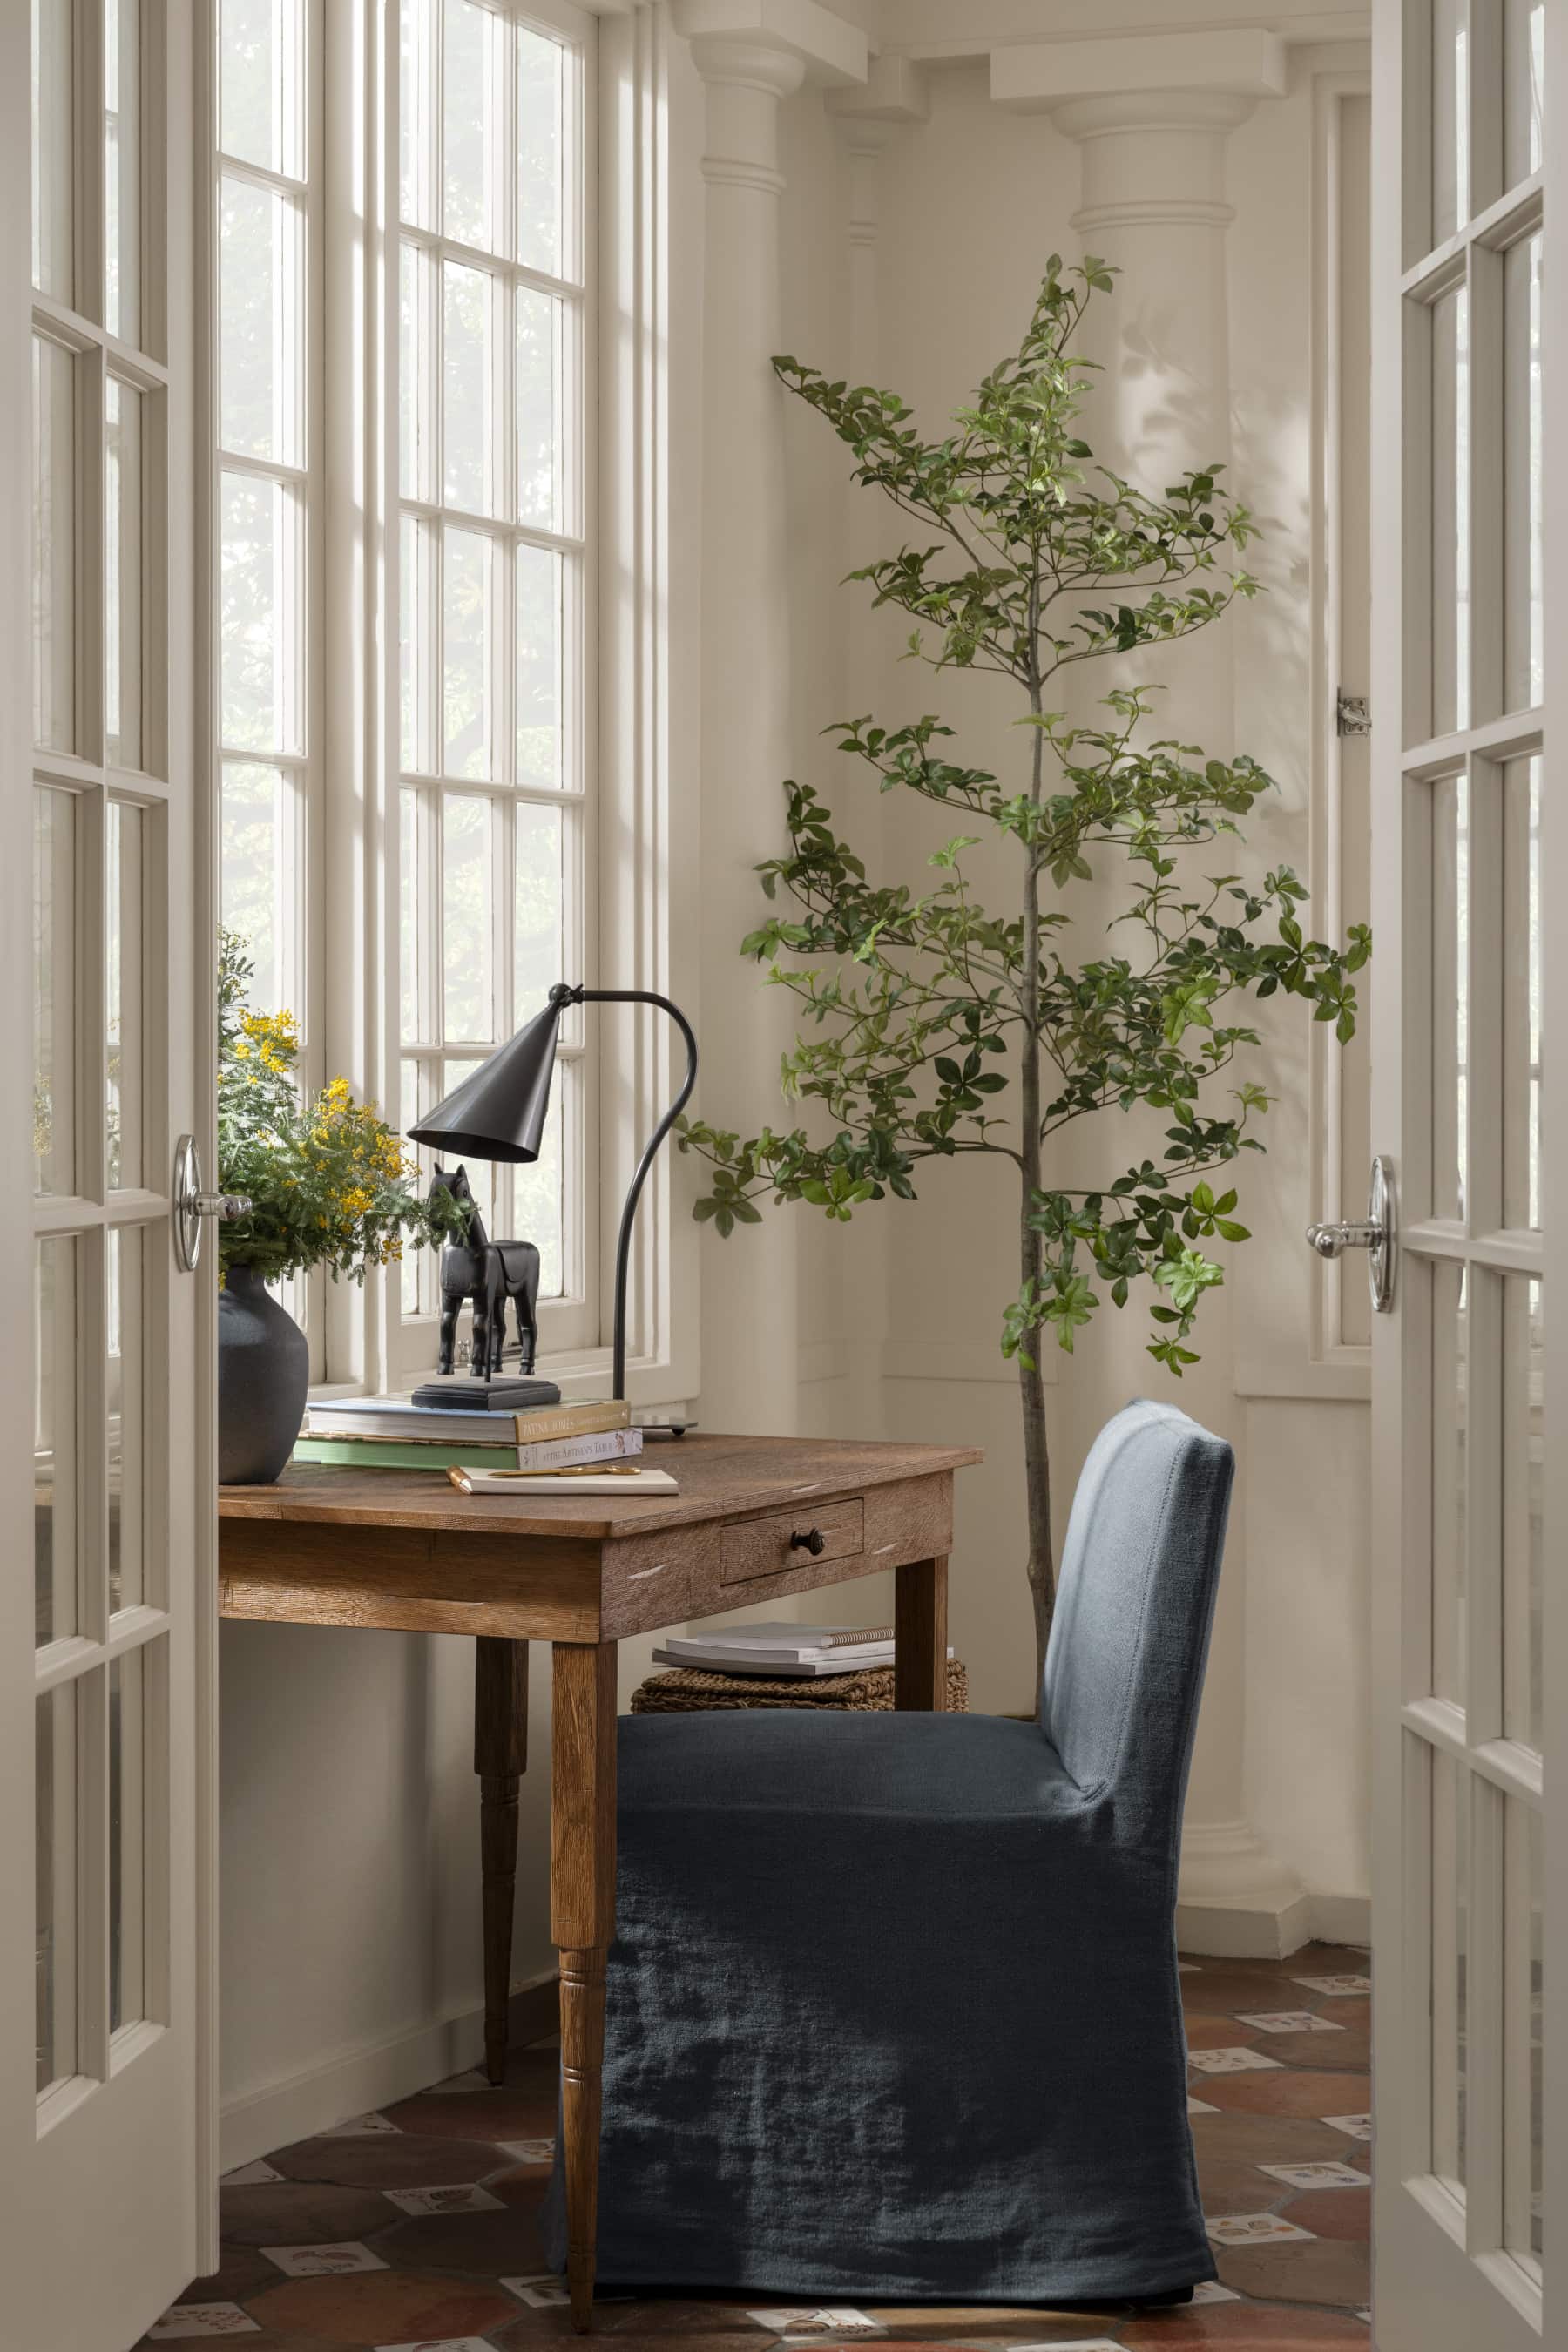
Style No. 10 | A Leaning Vignette


Style No. 01 | On Kitchen Shelving
Styling artwork on kitchen shelving feels a bit unexpected, and that’s what’s so perfect about it. Artwork leaned or hung on the back of kitchen shelves helps bring your shelving to life, adding contrast and interest when paired with some of your more display-worthy kitchen pieces like ceramic bowls or wooden cutting boards.


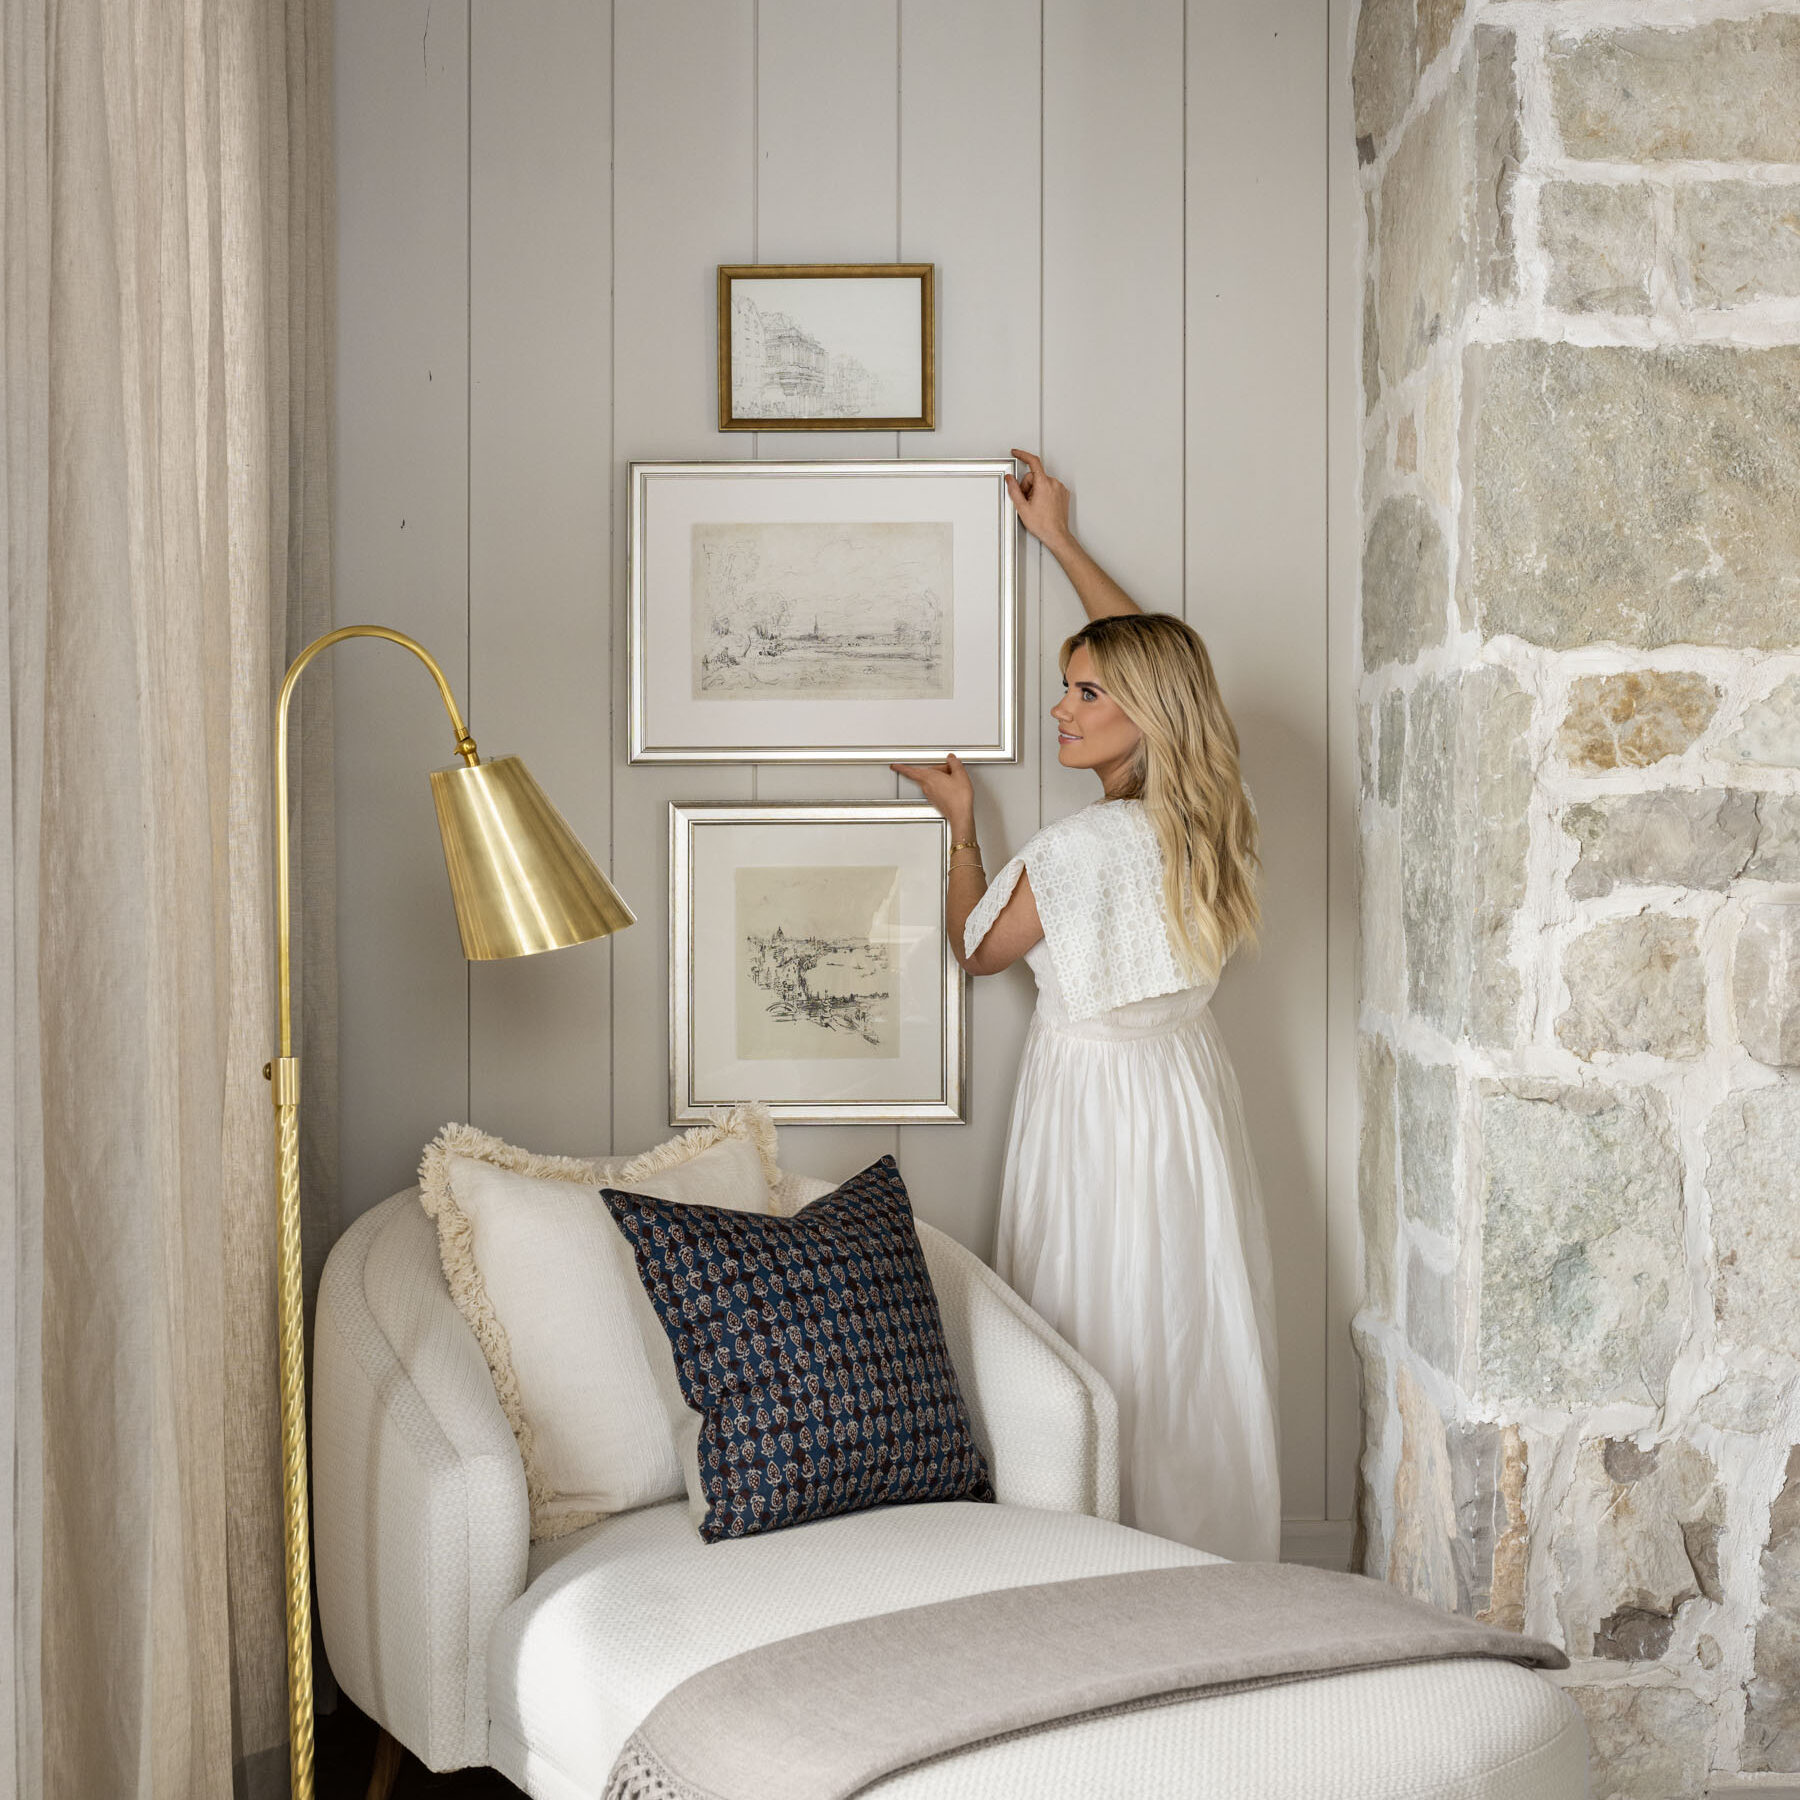
Style No. 02 | A Gallery Wall
It’s no secret that a collection of art is a powerful design moment when you have a vast wall that needs to be filled. You can have fun here by experimenting with different sizes of artwork hung together, different colors and materials of frames, varying orientations, utilizing some unframed pieces, etc. If you’re going in this direction, we suggest laying out the pieces on the floor beforehand to determine the best arrangement. Or, for a more minimalistic vibe, we love hanging a collection of artworks in identical frames and sizes, with slightly different artwork inside. In this case, hanging them in a perfect grid is the only way to go.


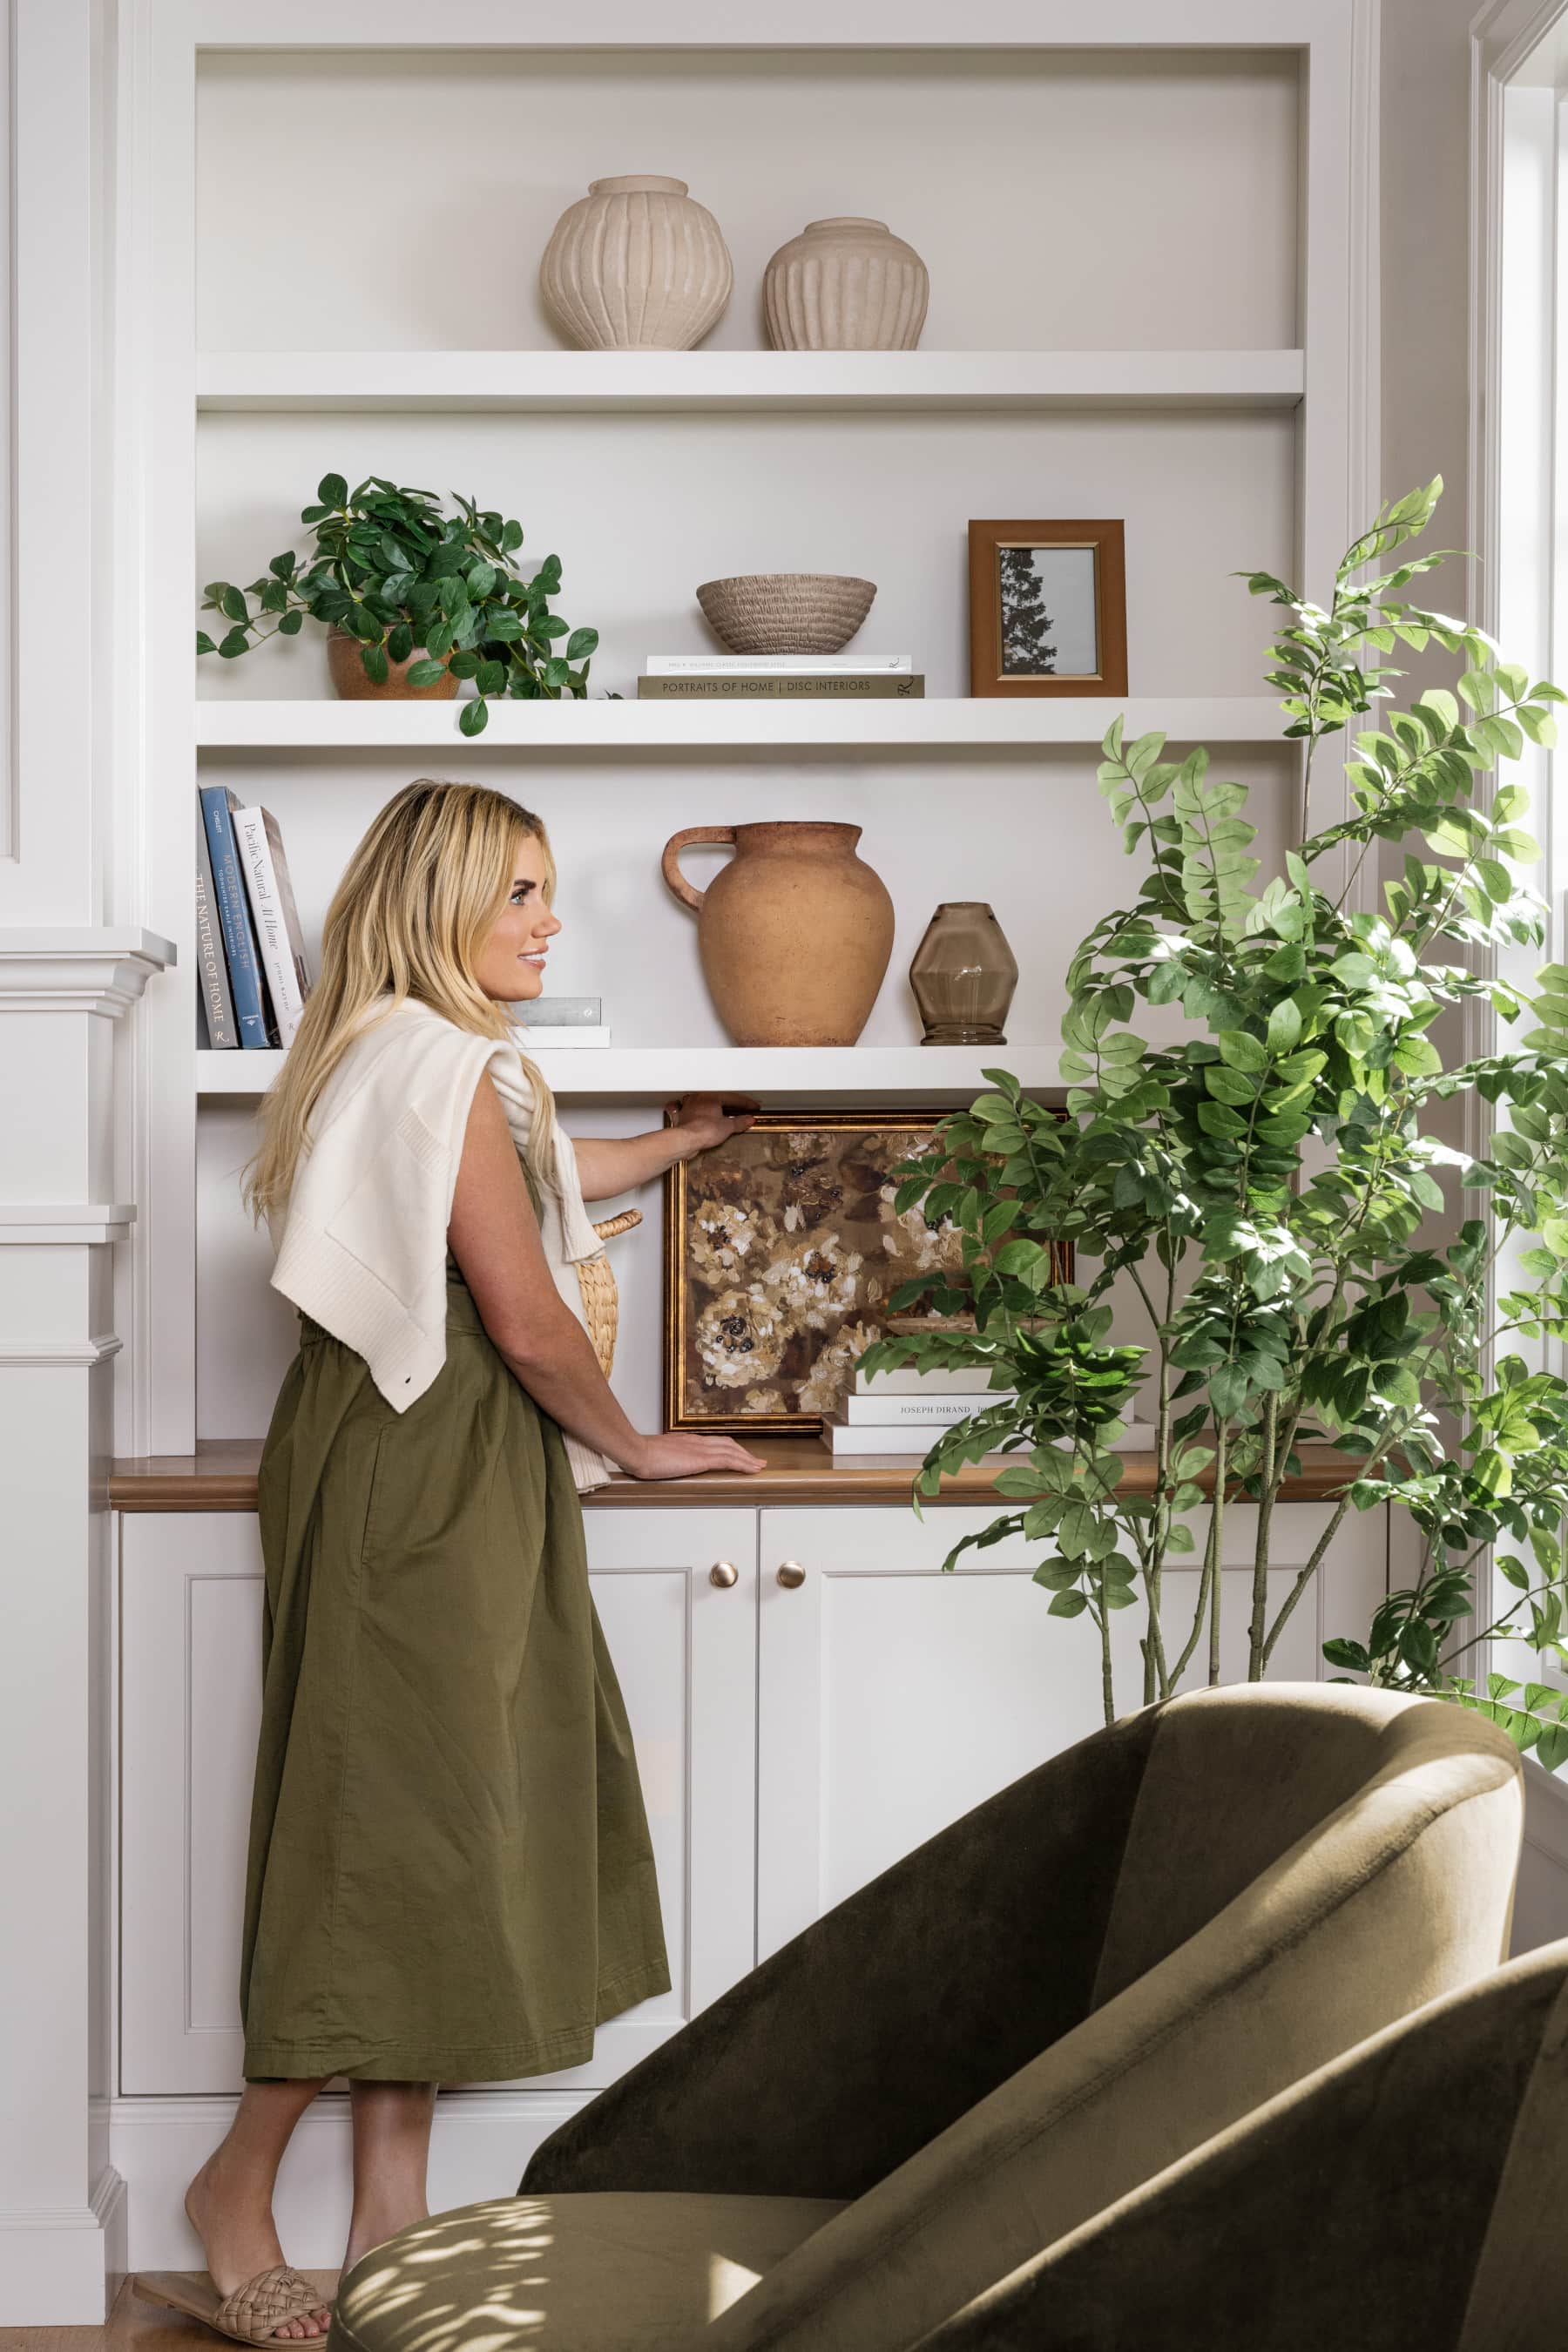
Style No. 03 | Layered on a Bookcase
Using a bookcase or open shelving to display art is a tried-and-true styling moment utilized by interior designers all the time. It’s a classic. You can lean (or hang!) the art against the back of the shelf, stacking books or objects of interest in front of it. You can utilize an easel and style it amongst other pieces, treating it as an object rather than an artwork. Or, one of the harder ones to pull off properly, you can hang the art on the exterior of the bookcase, along the partitions or shelves.


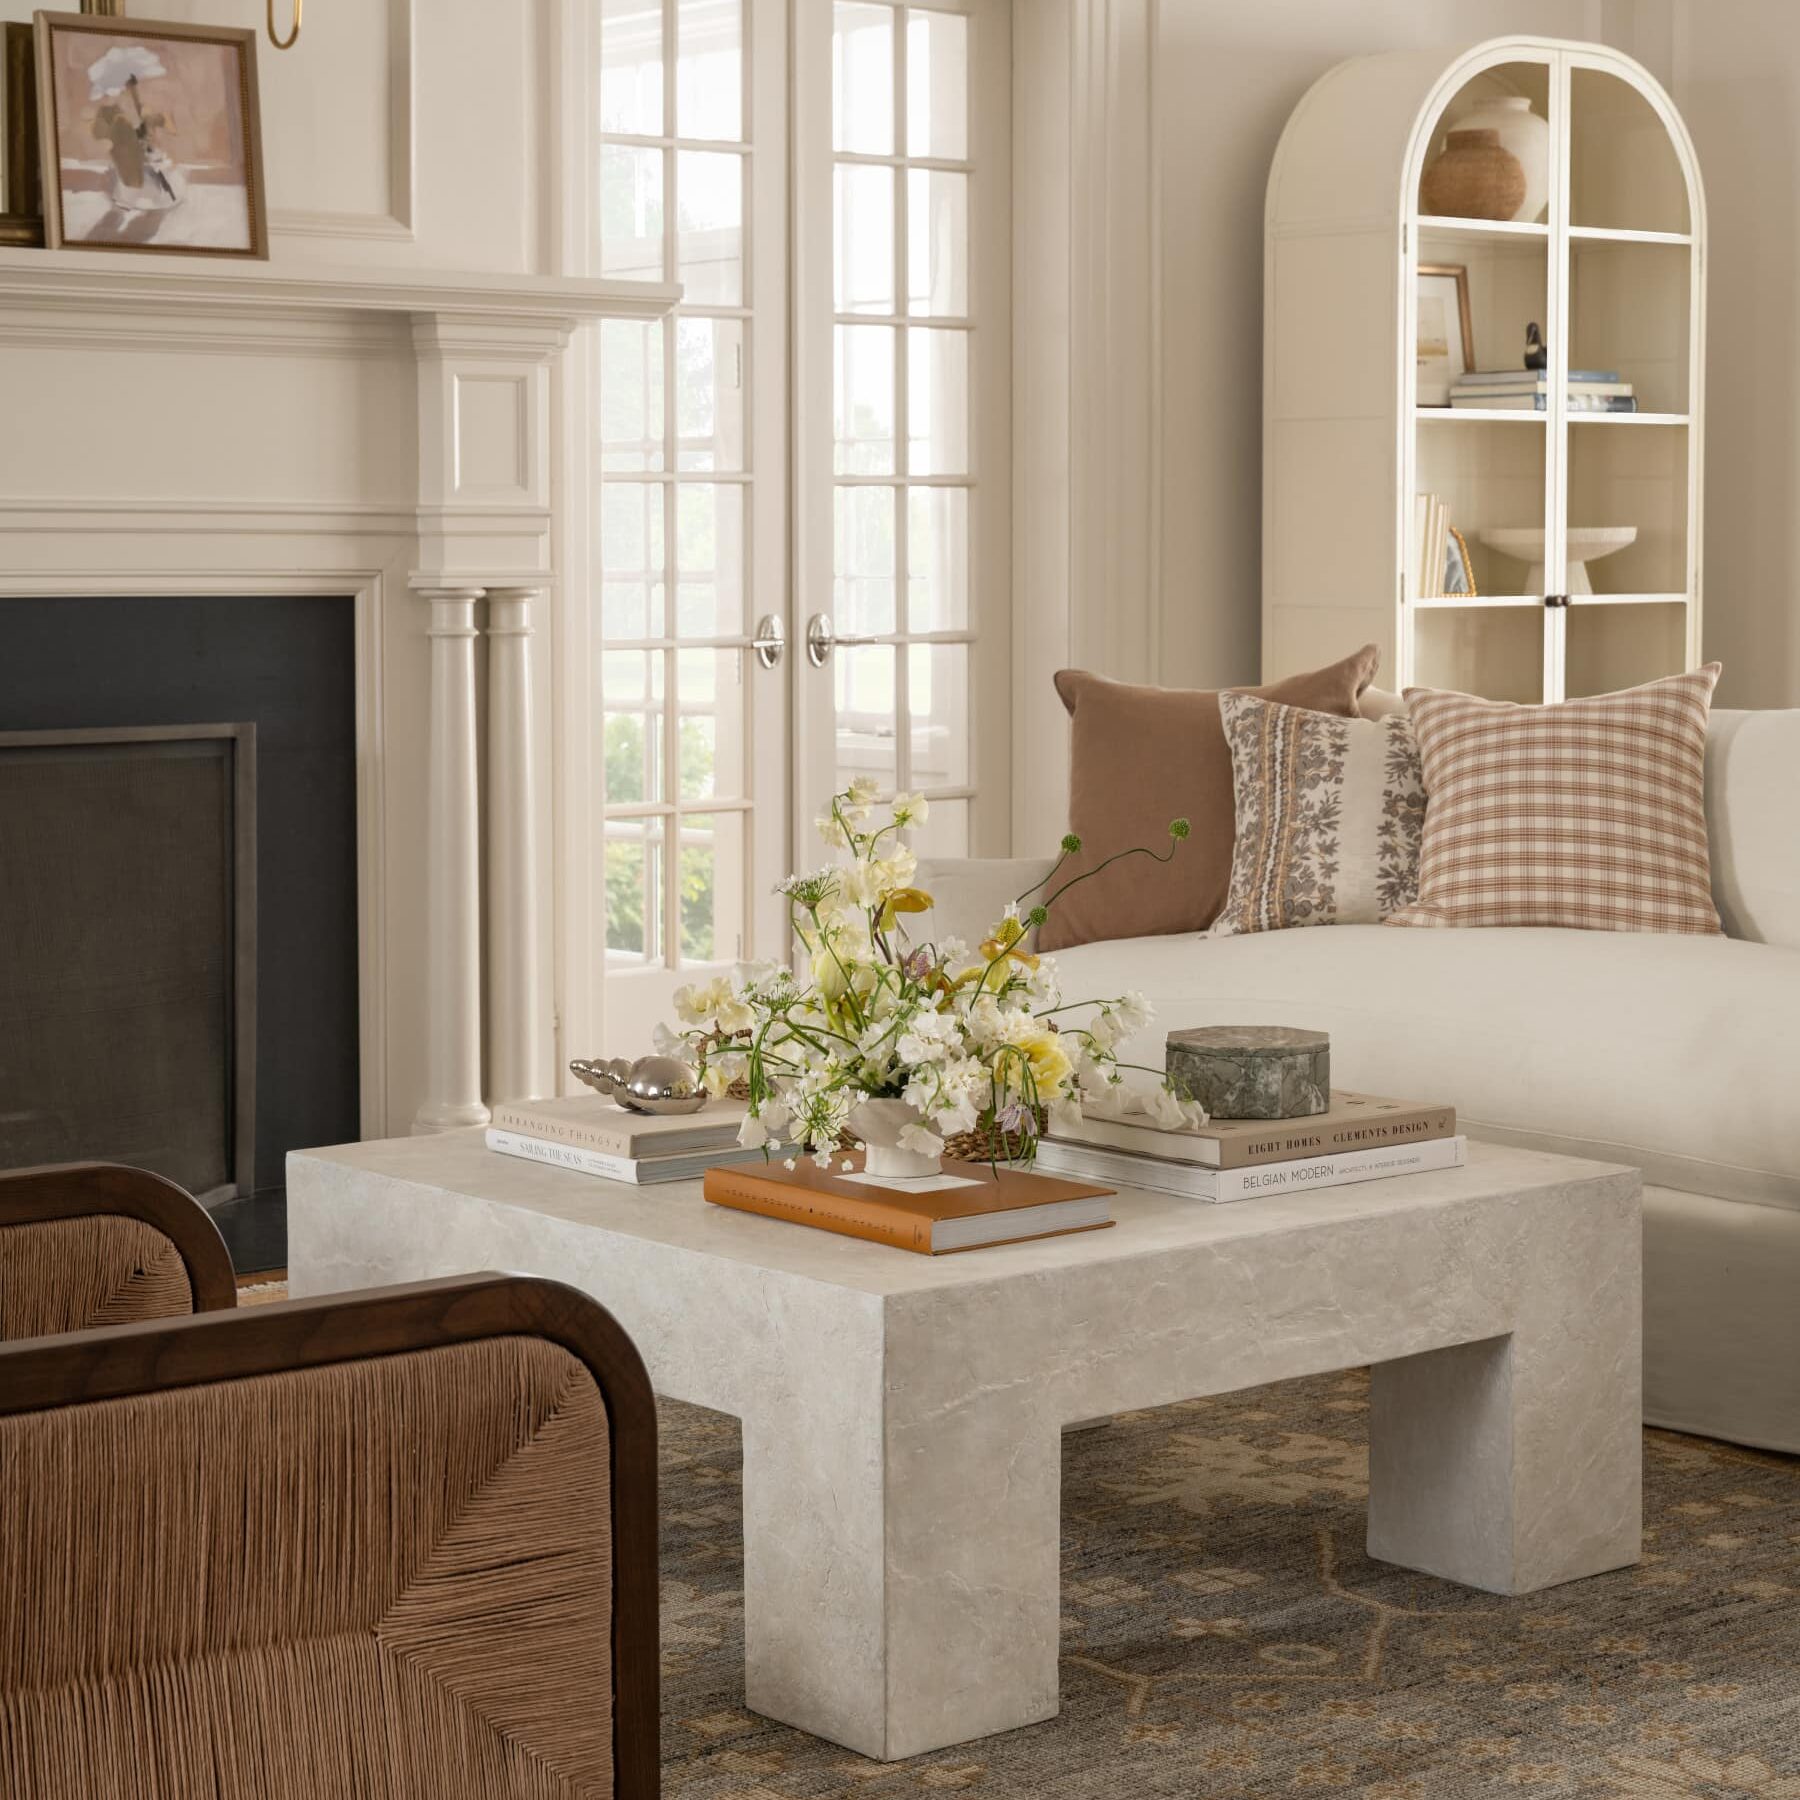
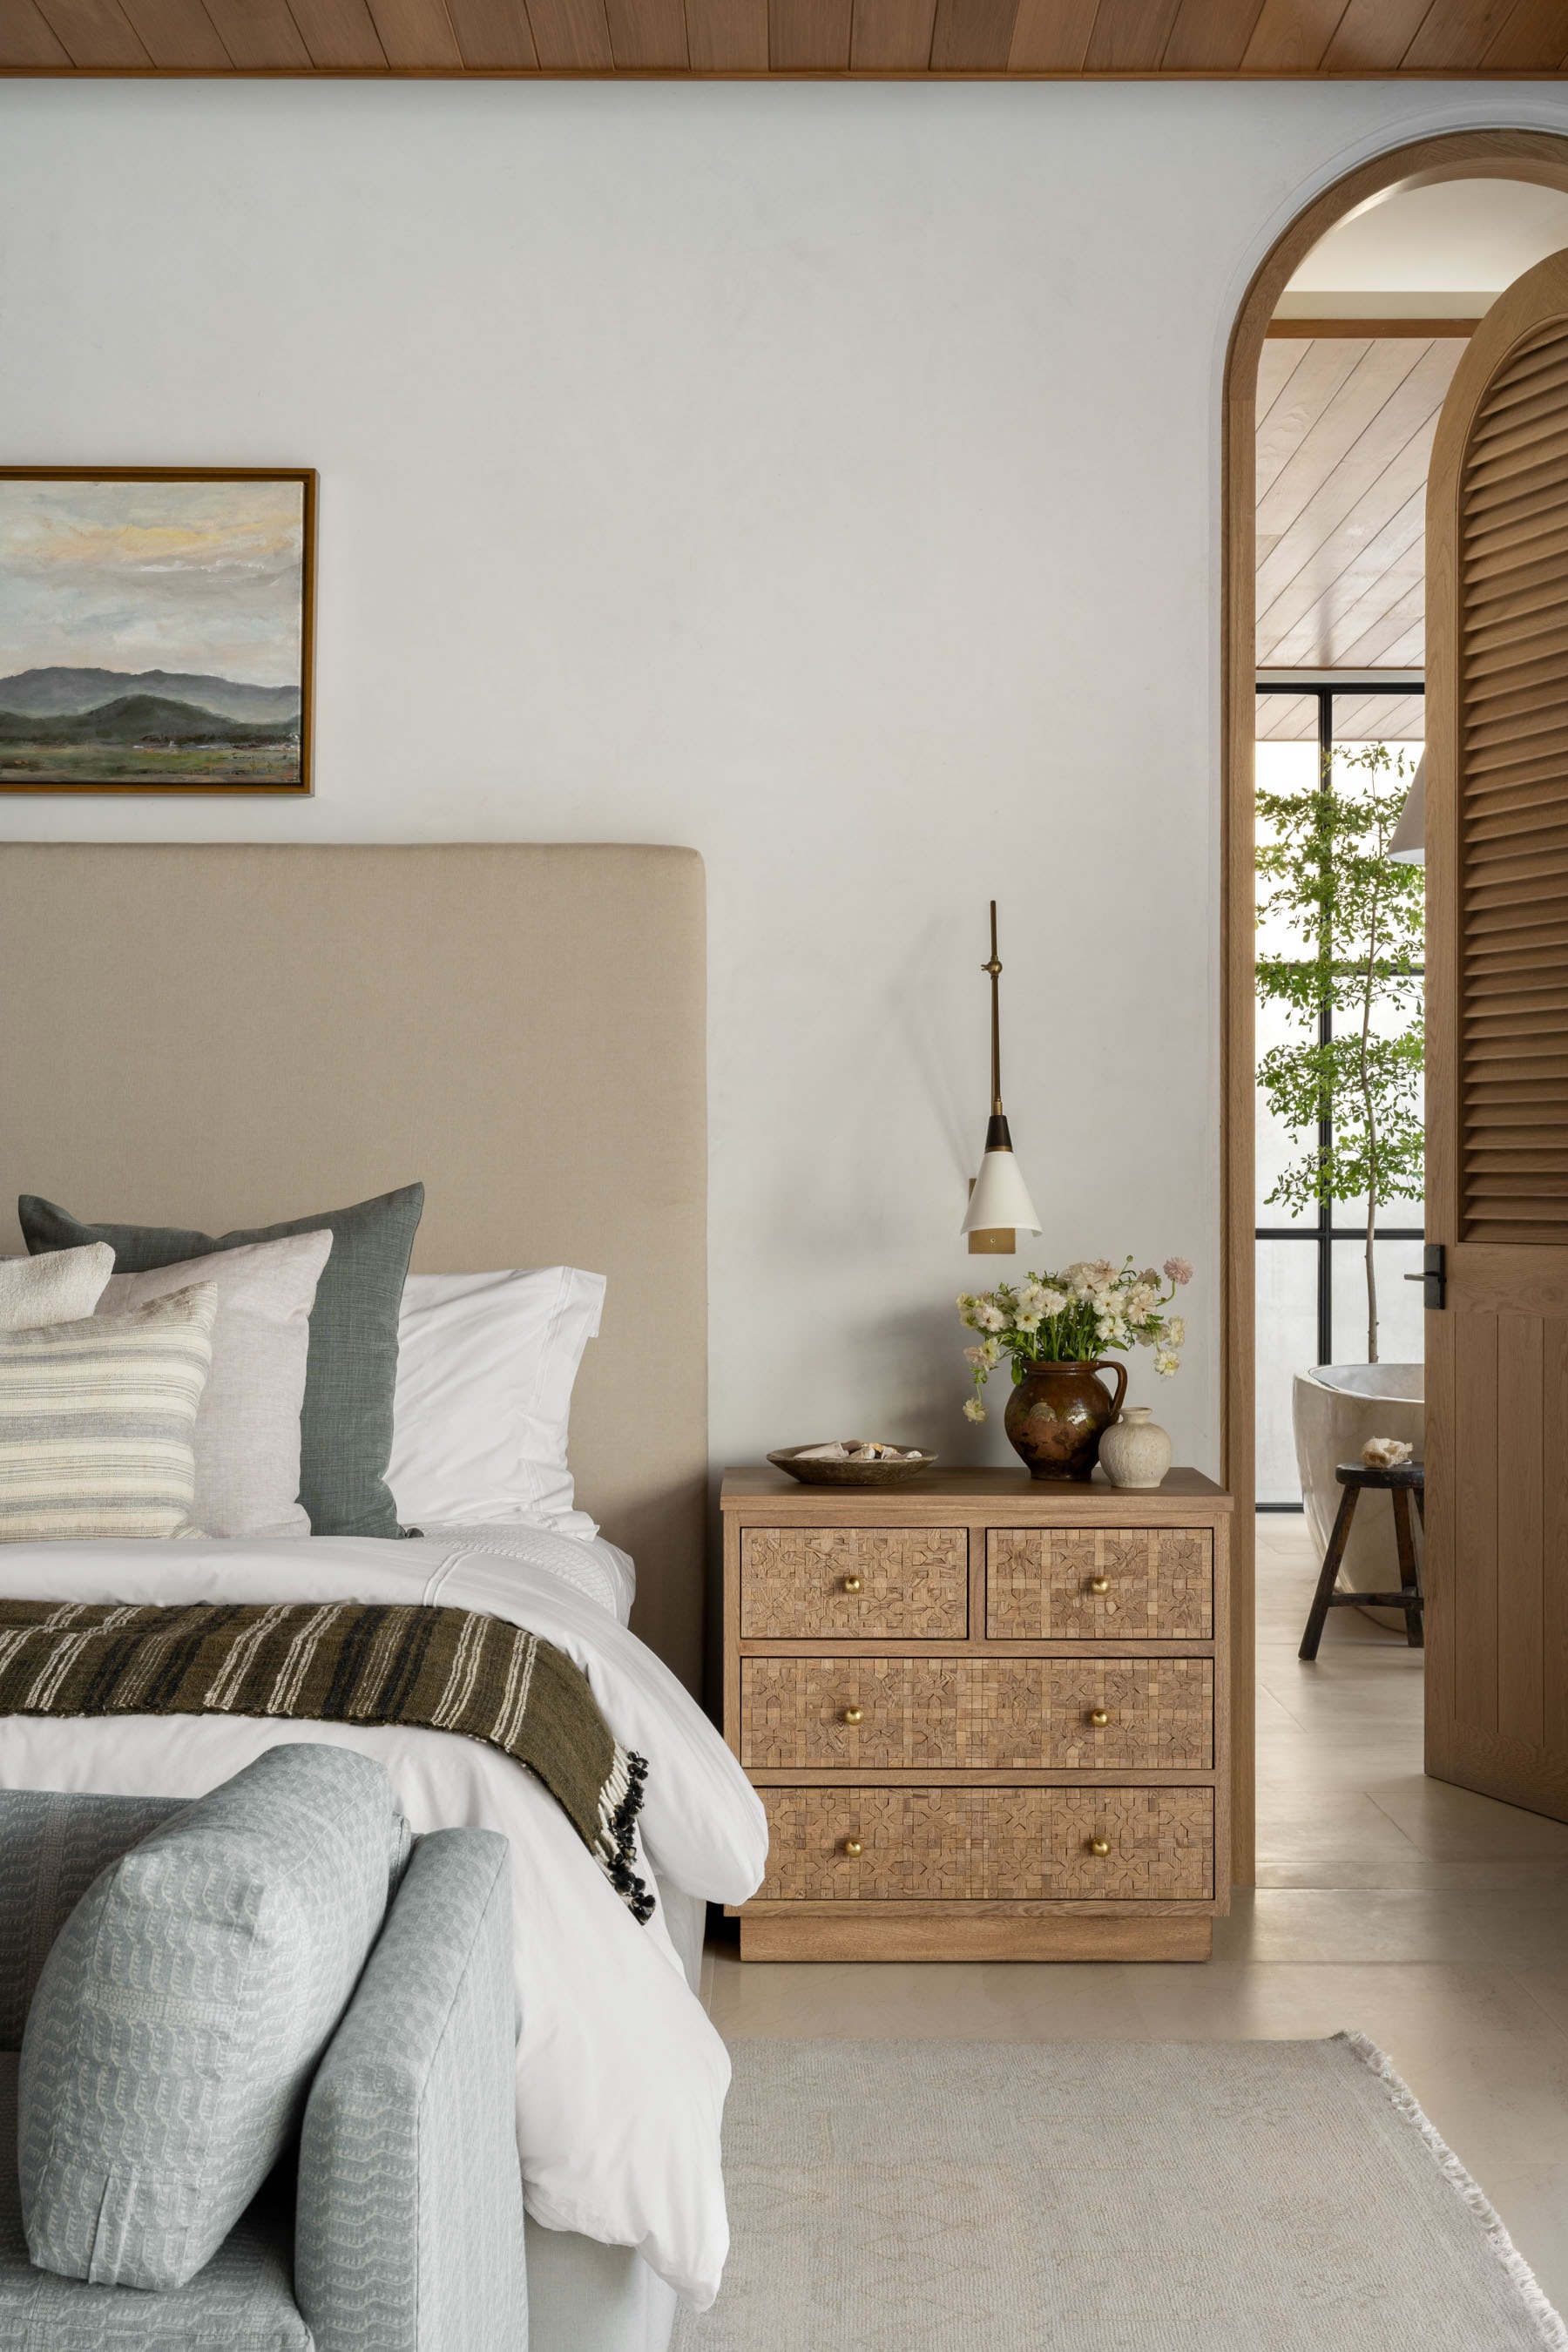
Style No. 04 | A Single Frame
A statement moment is easily had by hanging one single piece of artwork on a smaller scale in a slightly too large wall space. The key here is to place it close to something else, whether it be a nightstand or an entryway bench. You can hang it off center to create a moment of drama by going against the rules of symmetry. In this case, it’s almost the placement itself that’s the art.


Style No. 05 | On an Easel
For a cool, studio effect, try displaying your artwork on an easel—like this Metal Easel or Wooden Easel from McGee & Co. One of the aspects we love the most about this styling option is that the styling element itself becomes part of the art. A vintage artwork framed in wood styled on a metal easel creates a powerful visual statement.


Style No. 06 | Above a Chair
Create a simple, but darling design moment by hanging a simple art piece above an accent chair. This singular hanging piece can help finish a corner, but it can also make that simply designed corner a standout moment in the overall design of the room. To achieve this look, it’s important you hang the artwork in a way that makes the art and the chair feel like a cohesive unit. It needs to feel visually connected. To do that, the key is to hang the frame at the right height. In this case, mount the frame so the bottom of it is no more than 10” above the top of the chair and no less than 6”.


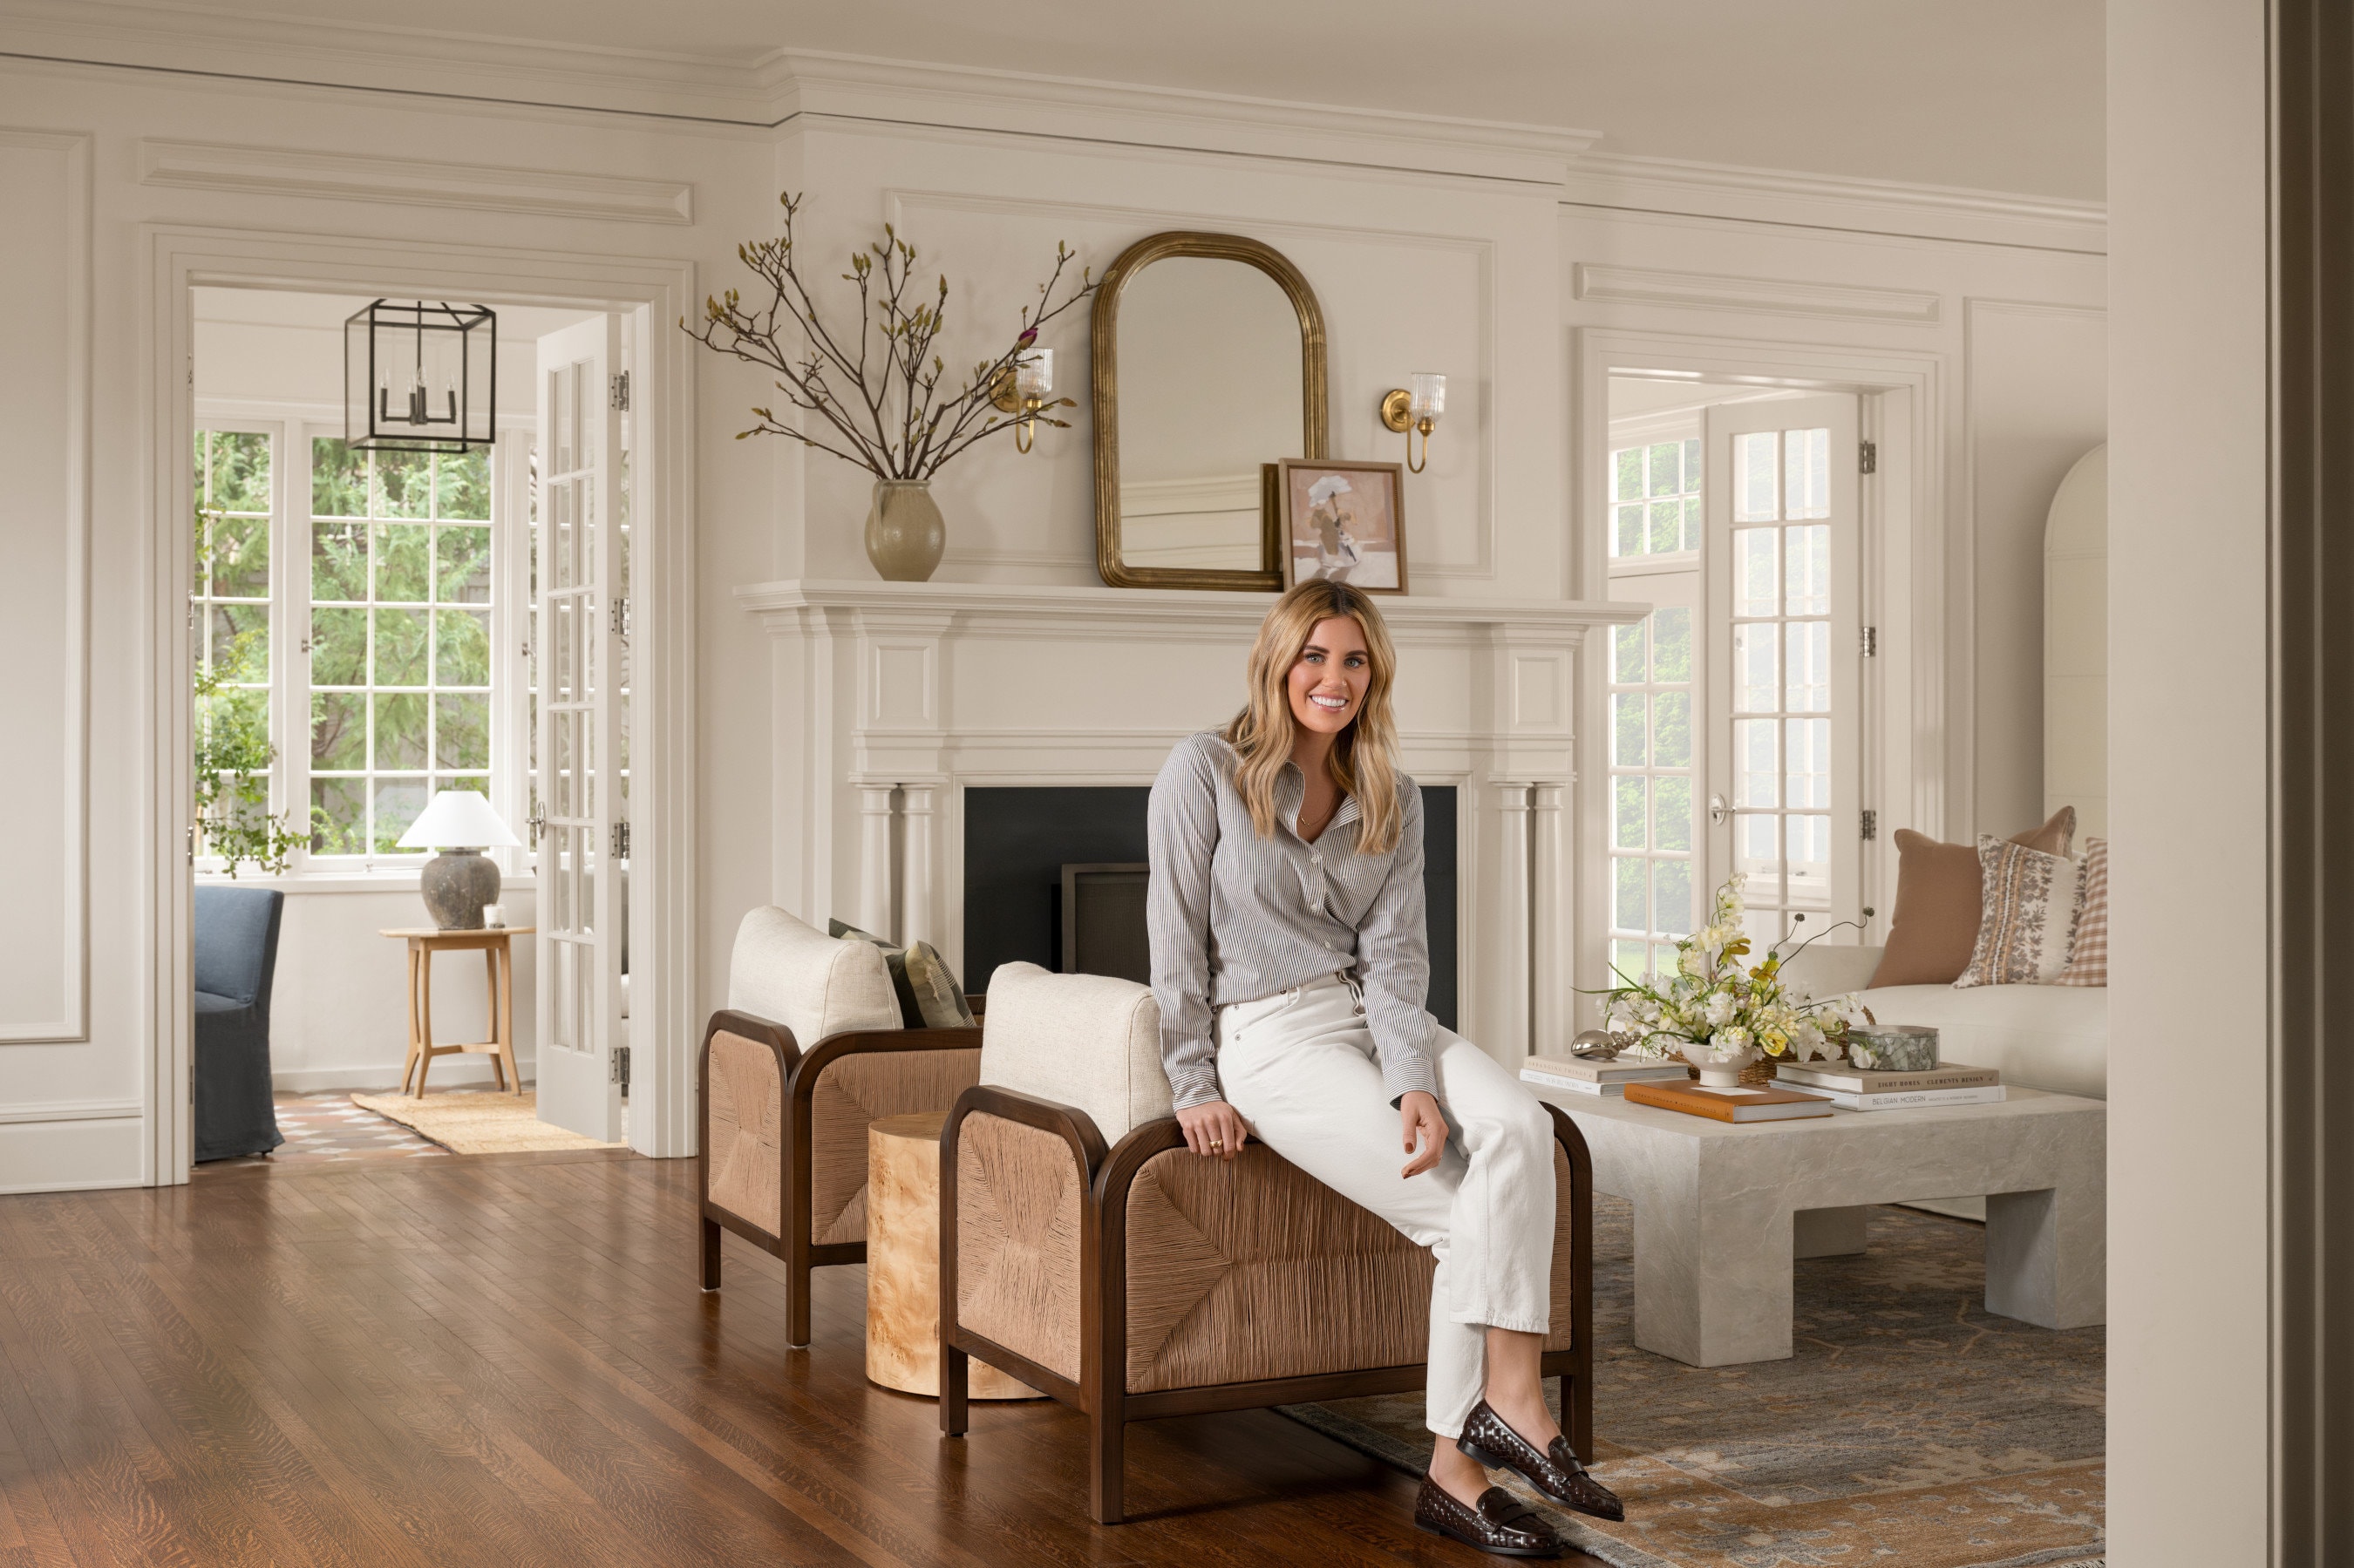
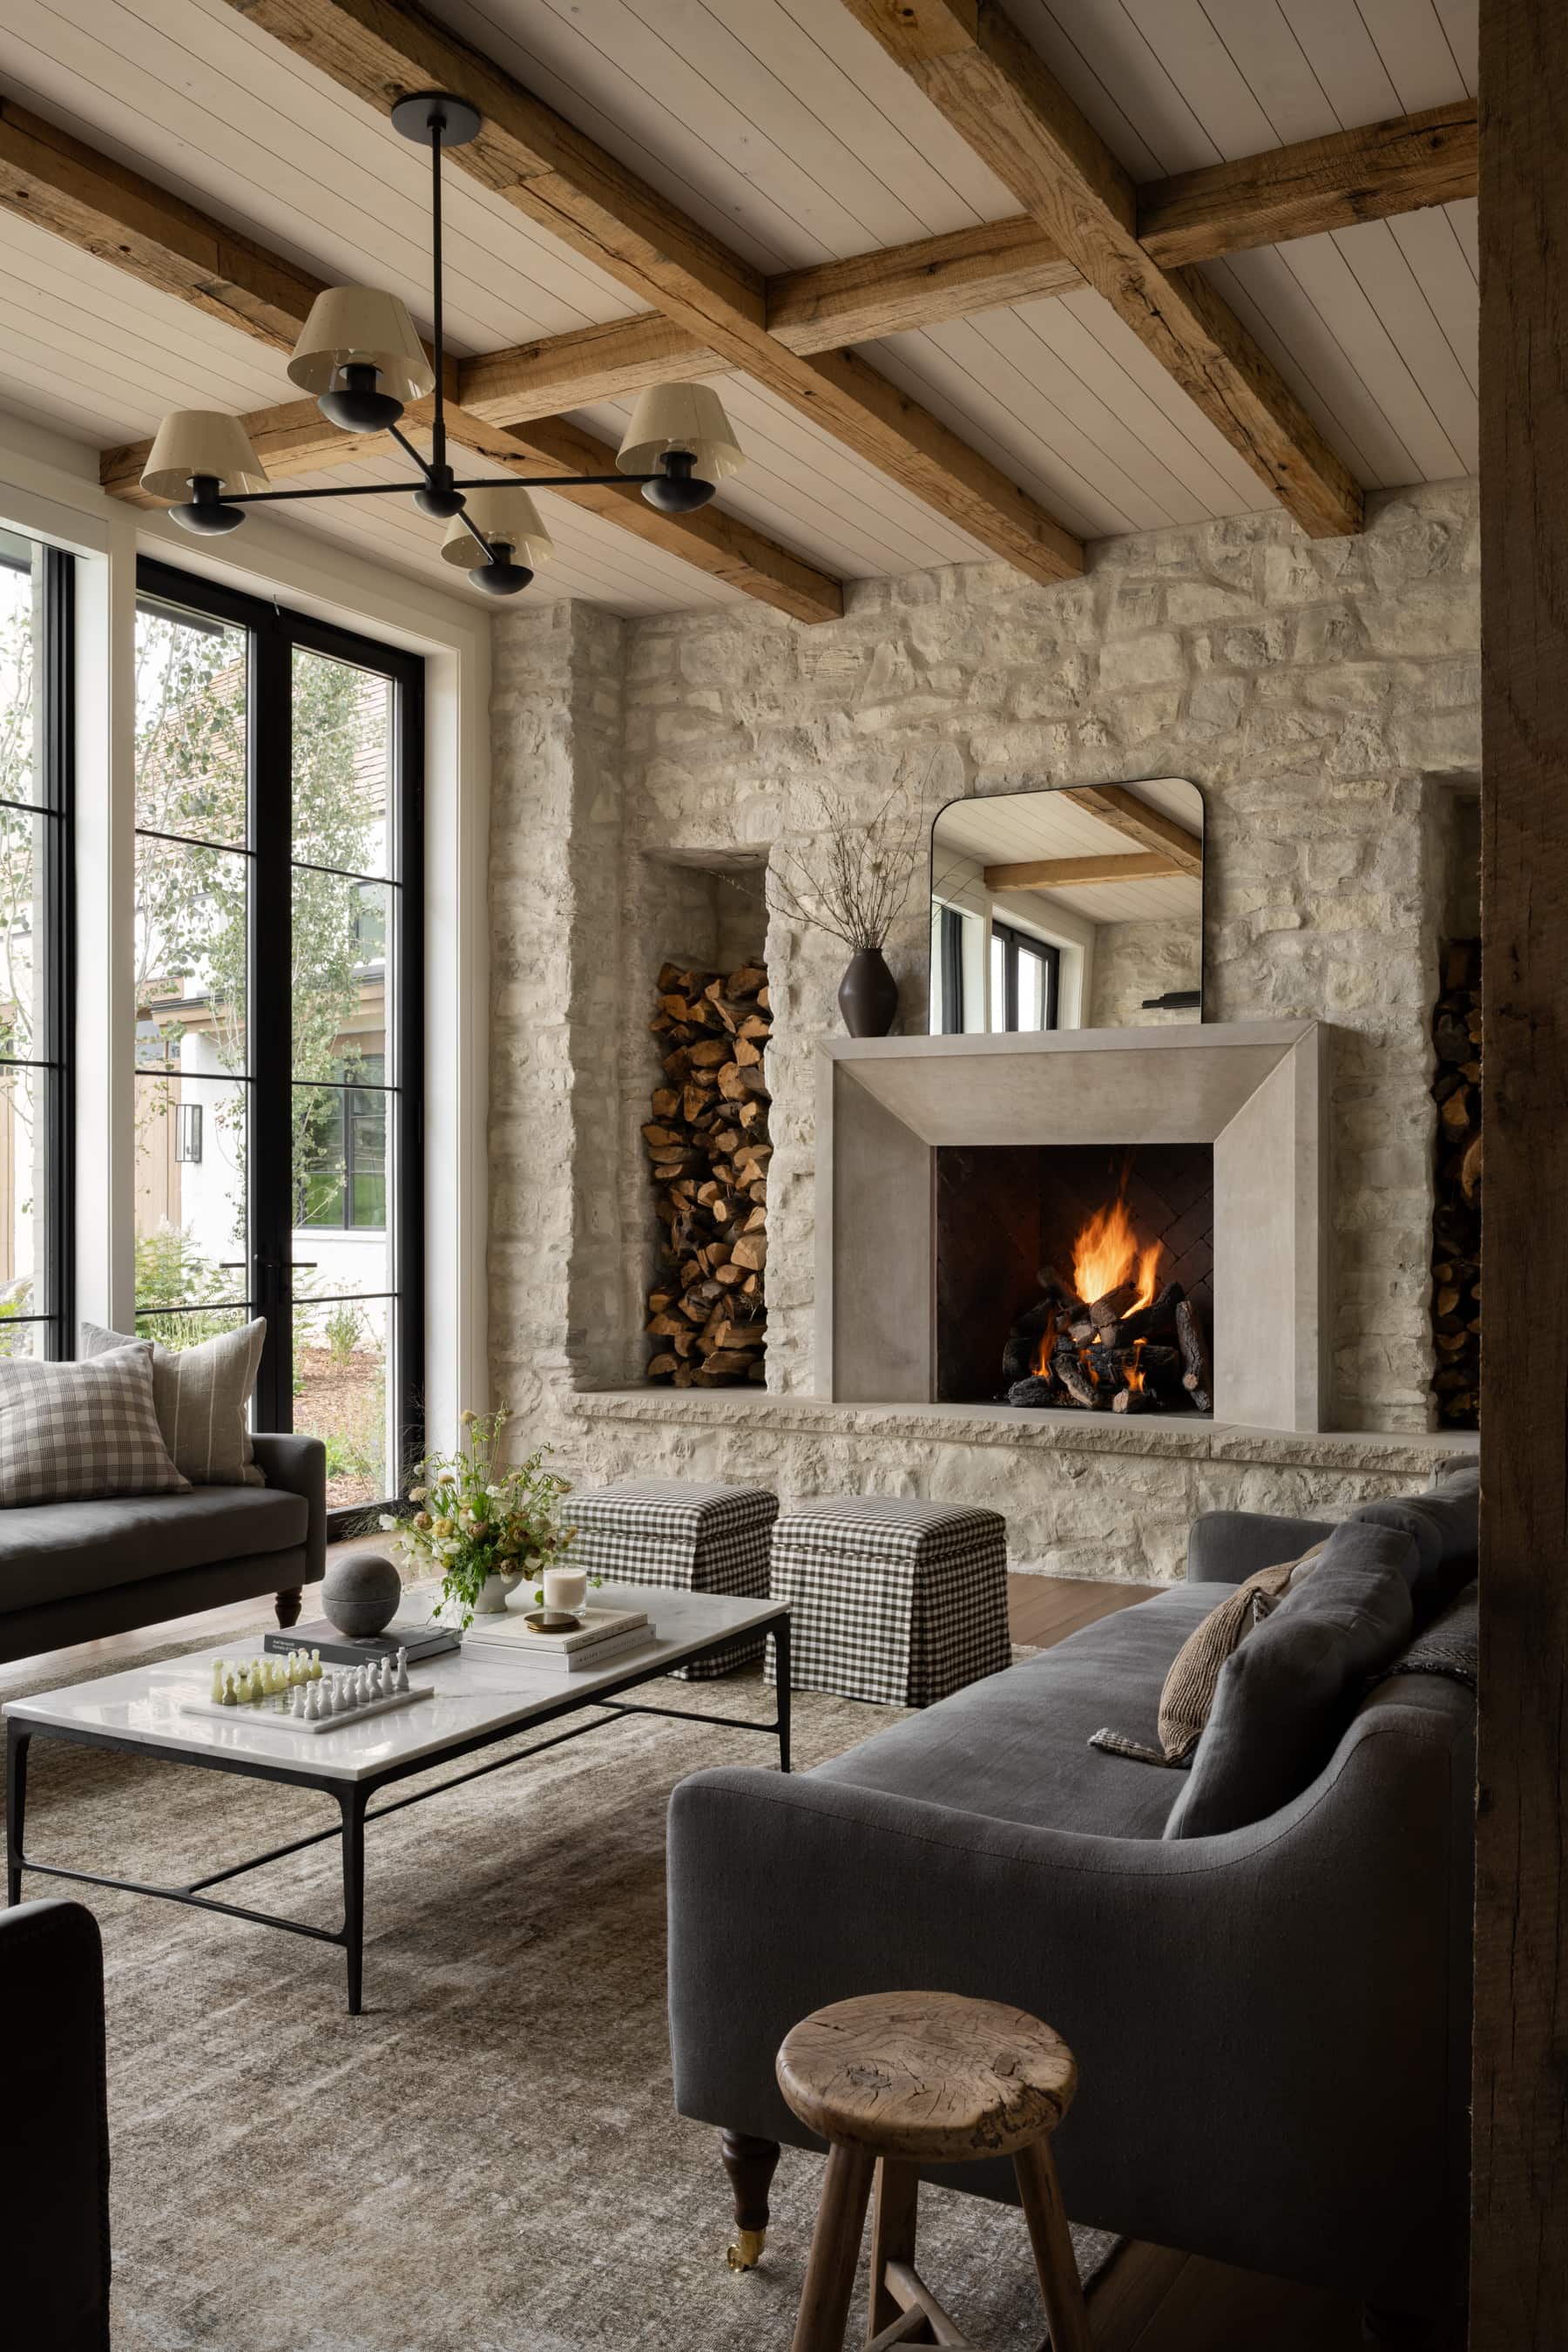
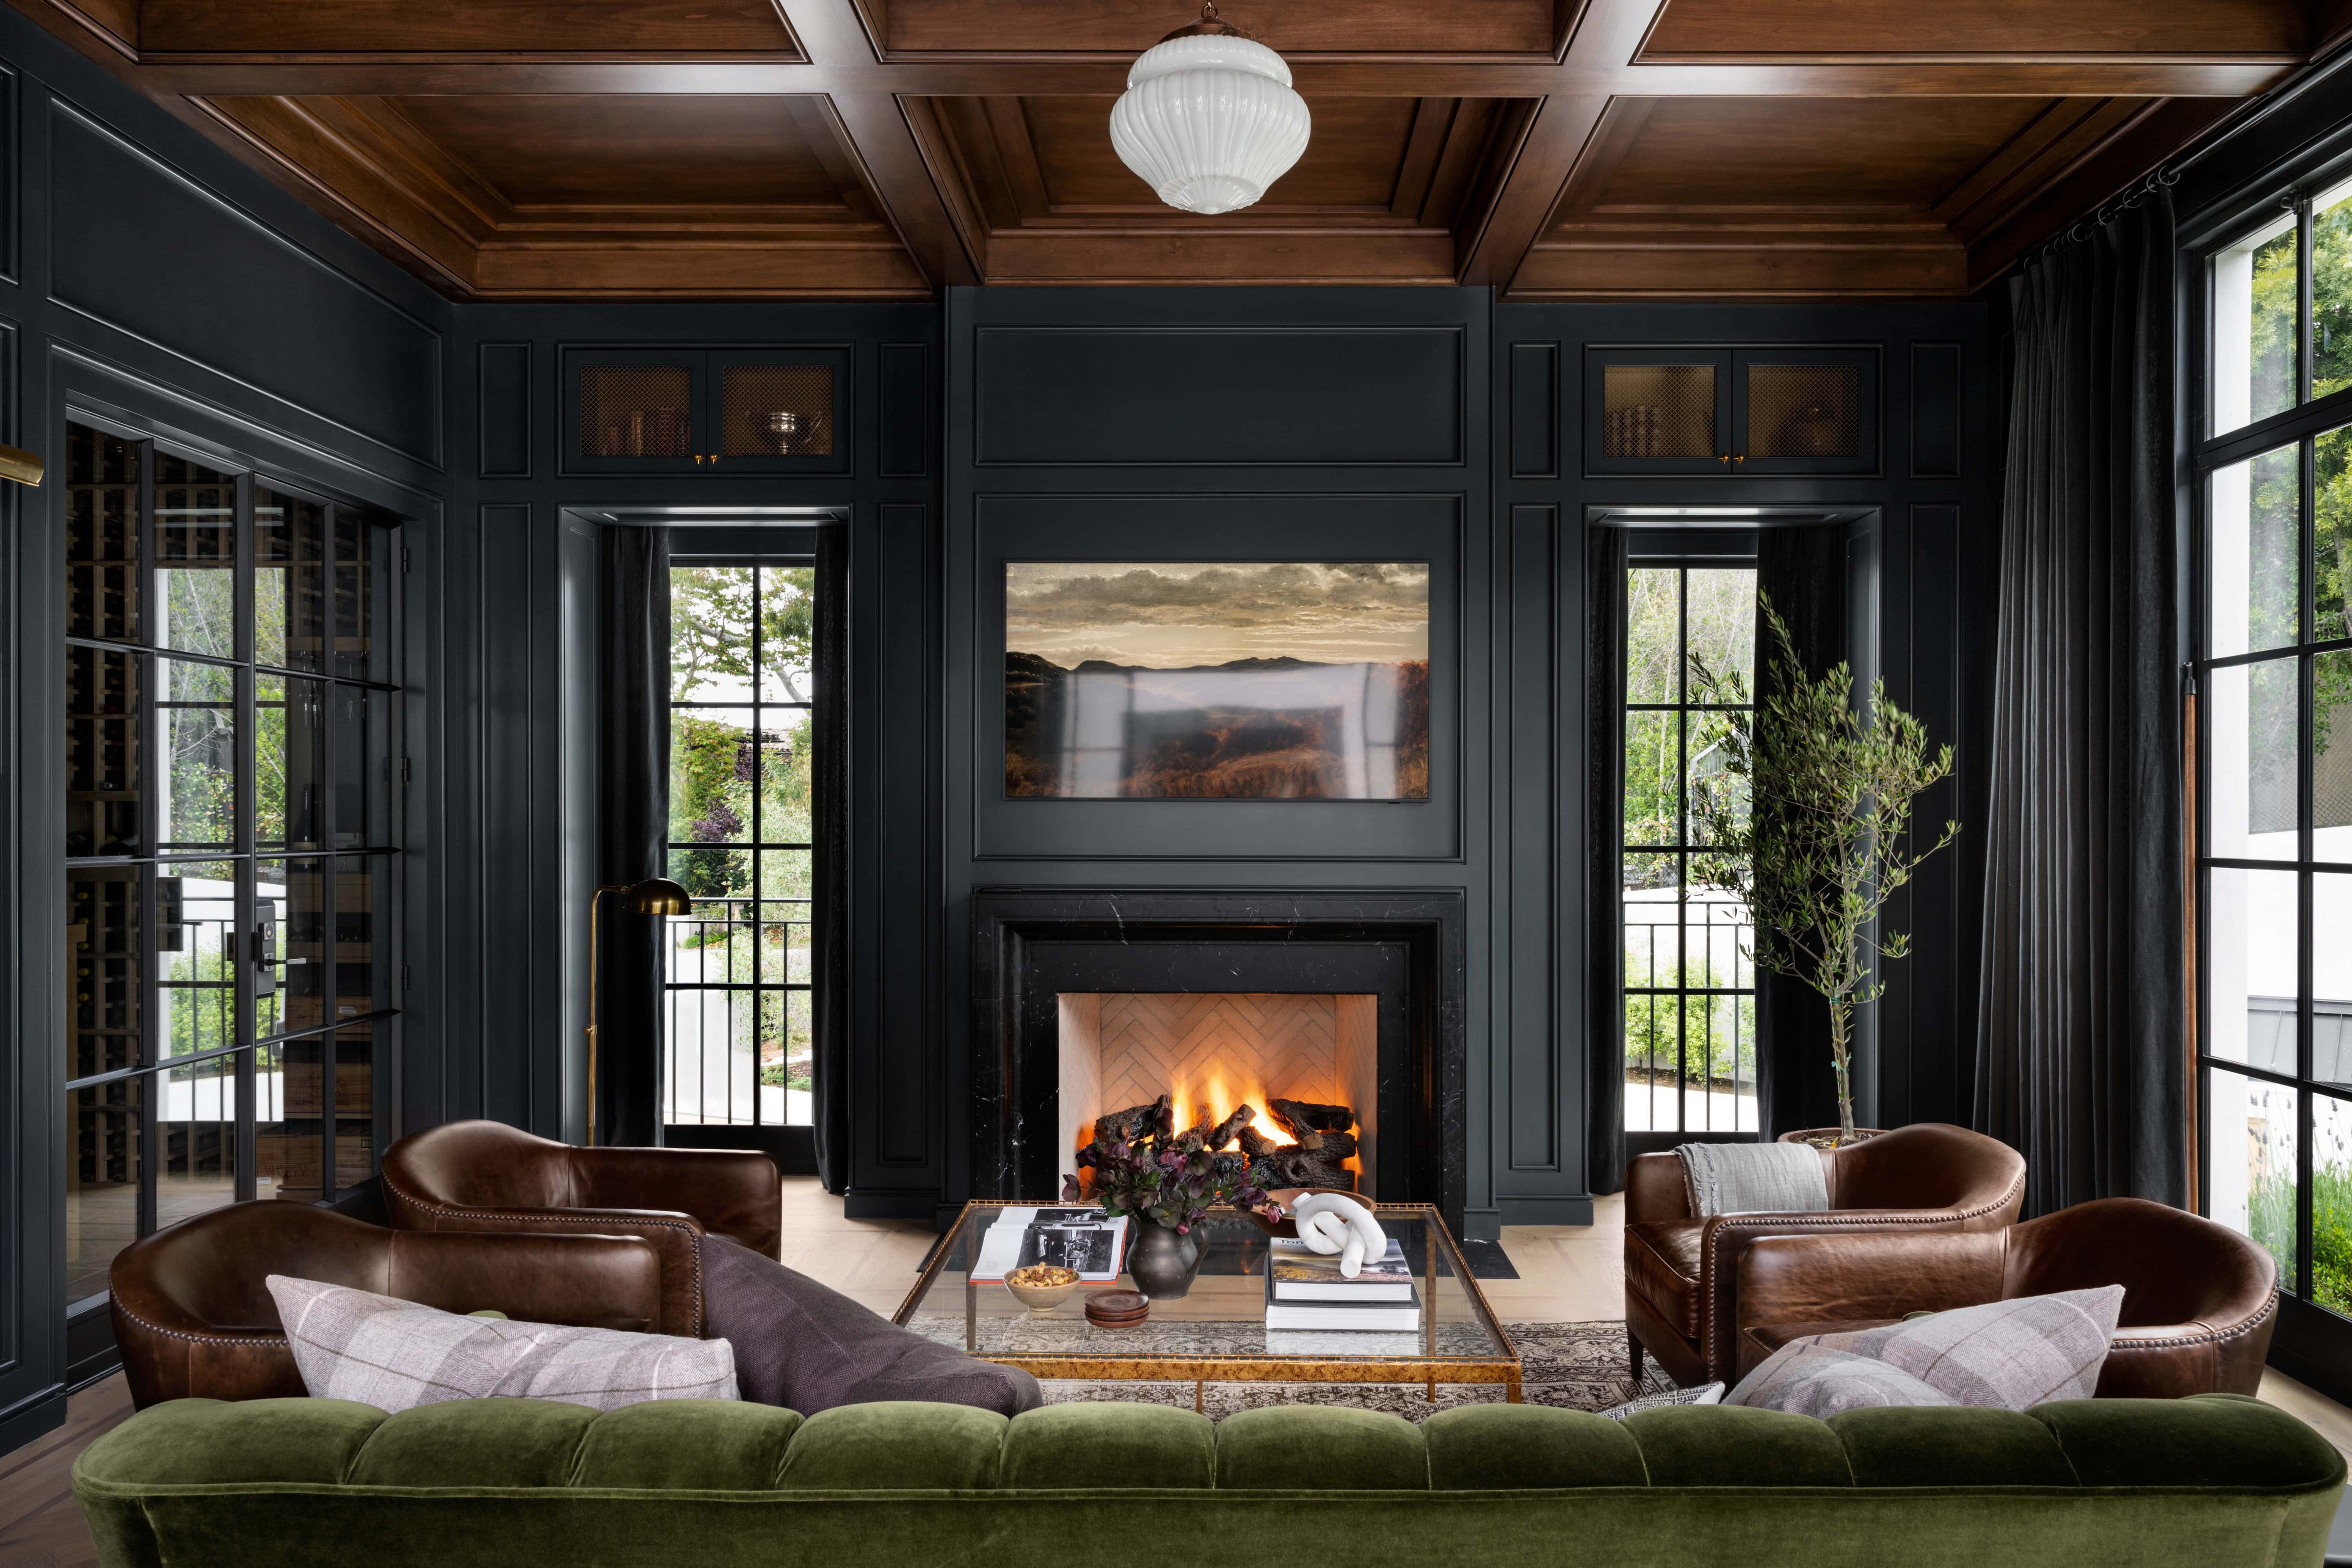
Style No. 07 | On a Mantel
Above a fireplace or mantel is a great place to display your favorite piece of artwork, as it is often the focal point of a room. In this case, symmetry goes a long way, as does scale—center your art and choose something that is slightly smaller than the width of the mantle. Make sure you pick a piece that is capable of holding this spot in an equally dramatic way as what’s below it.


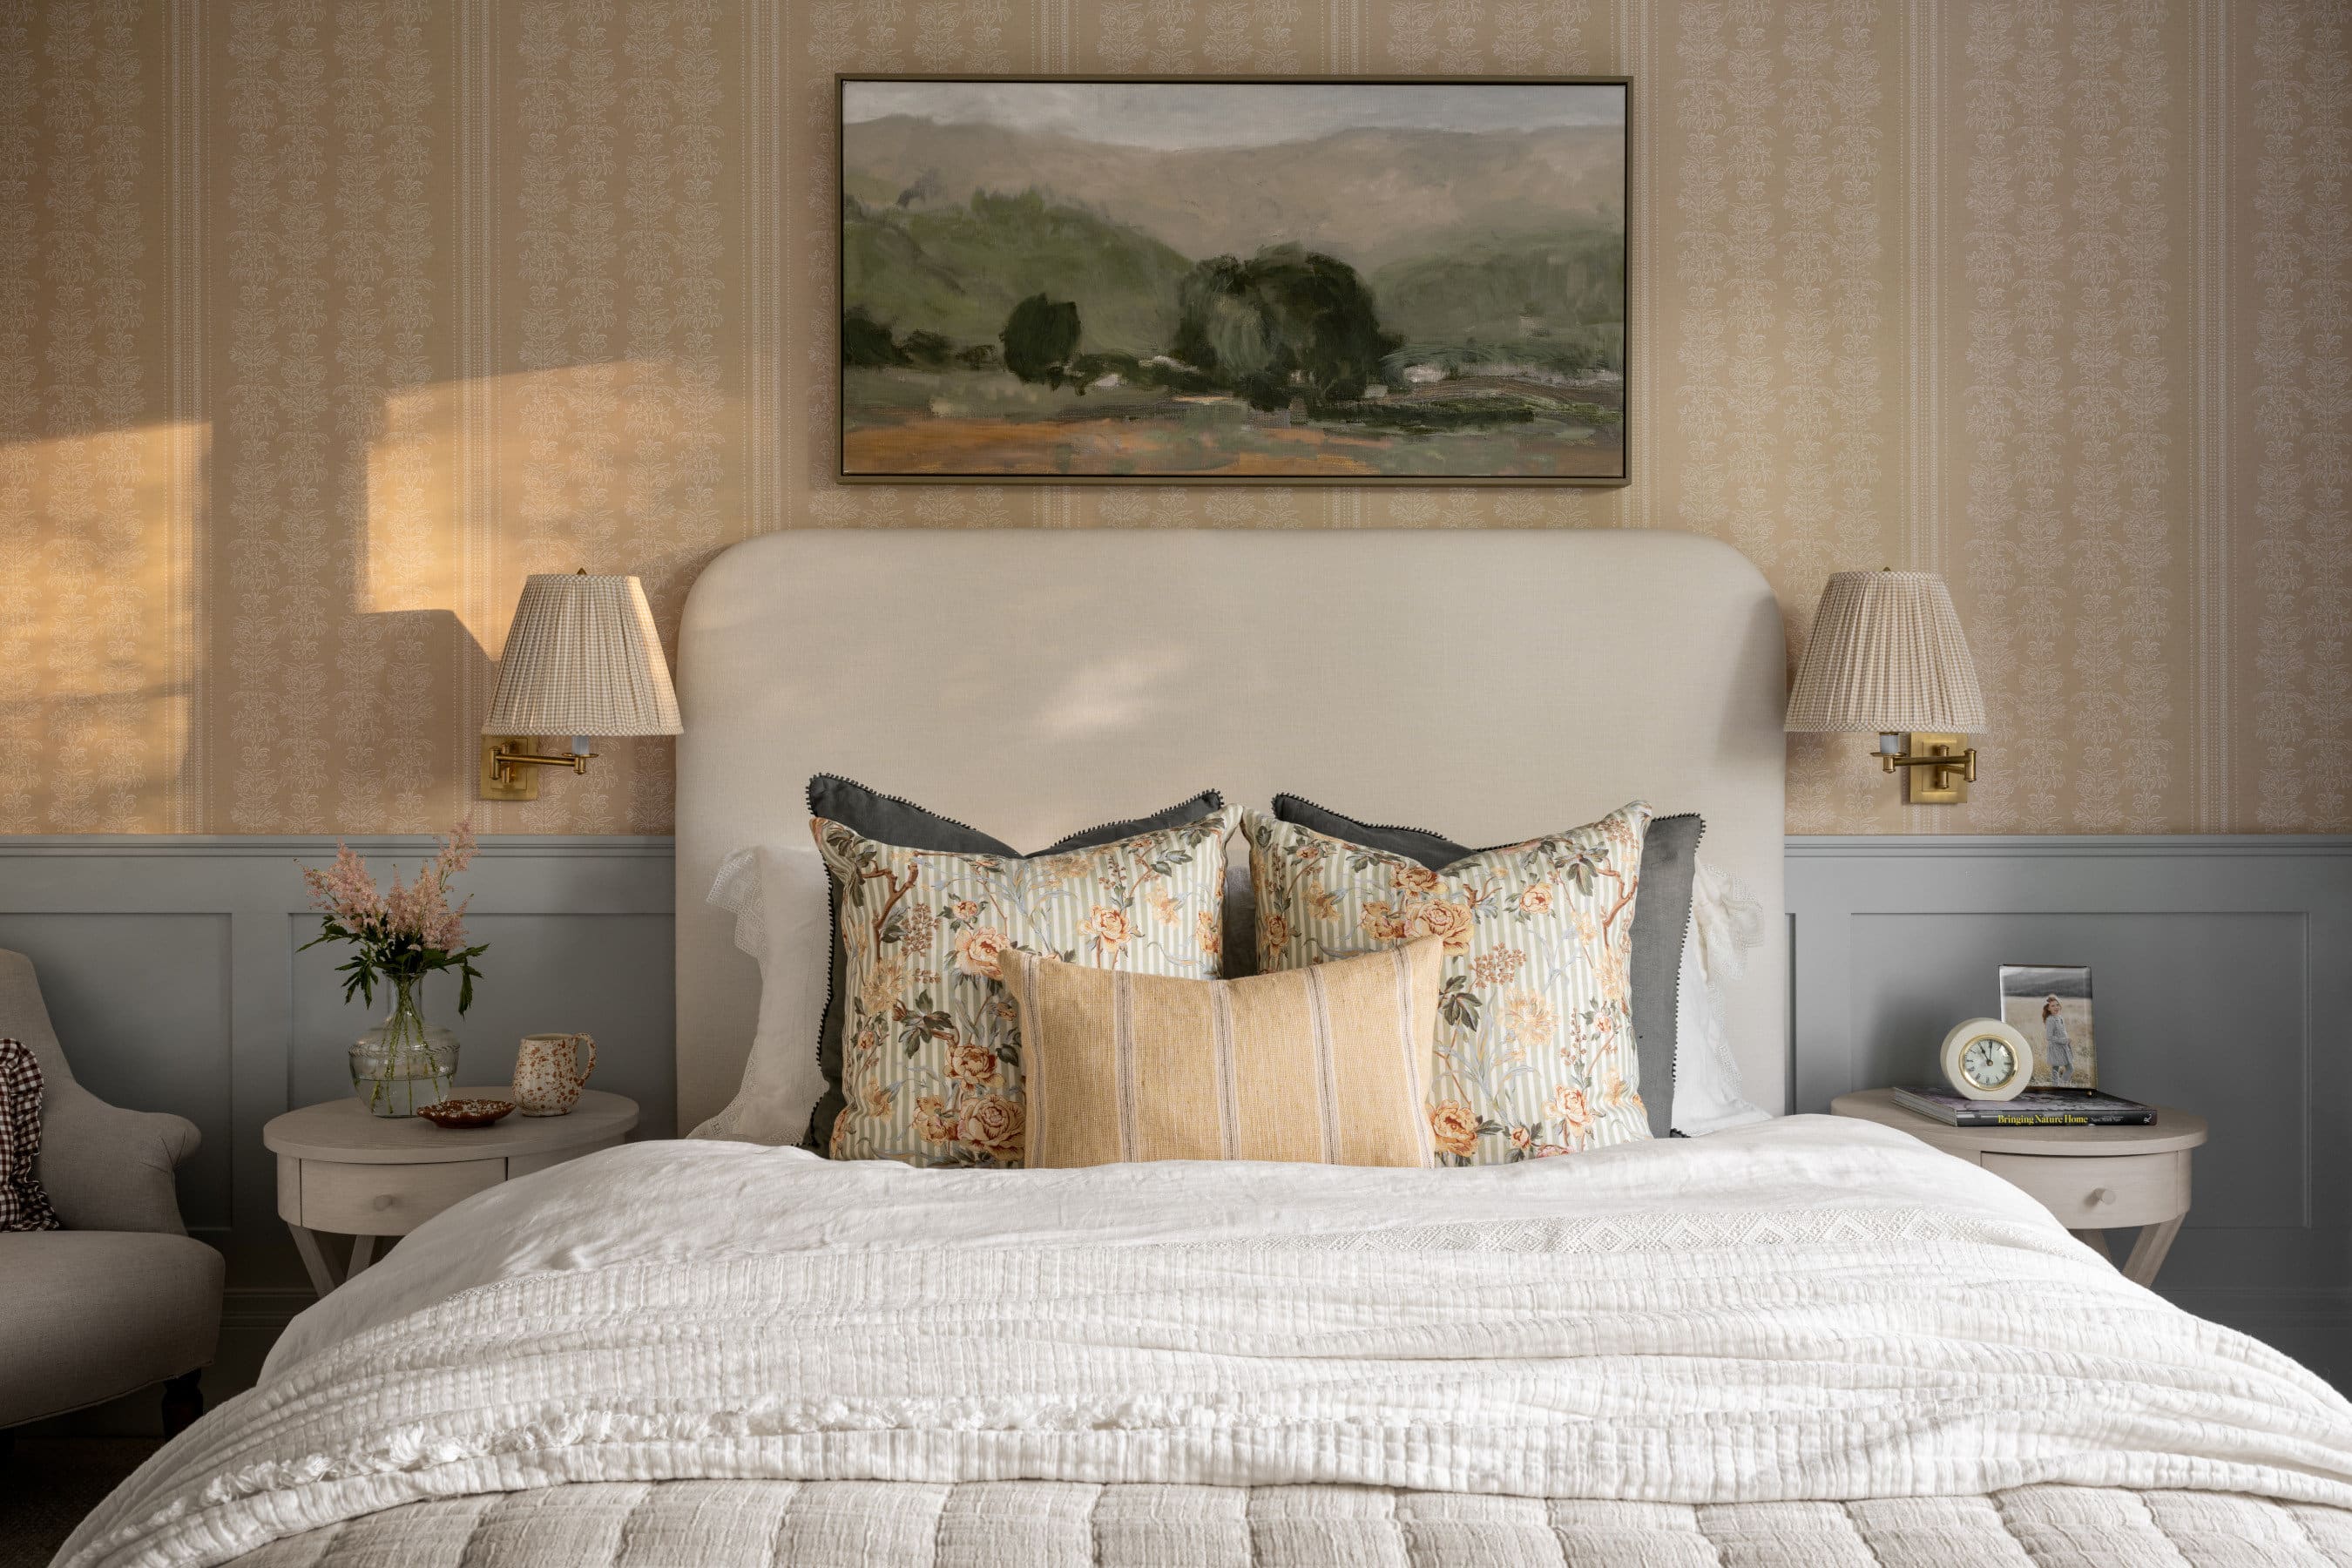
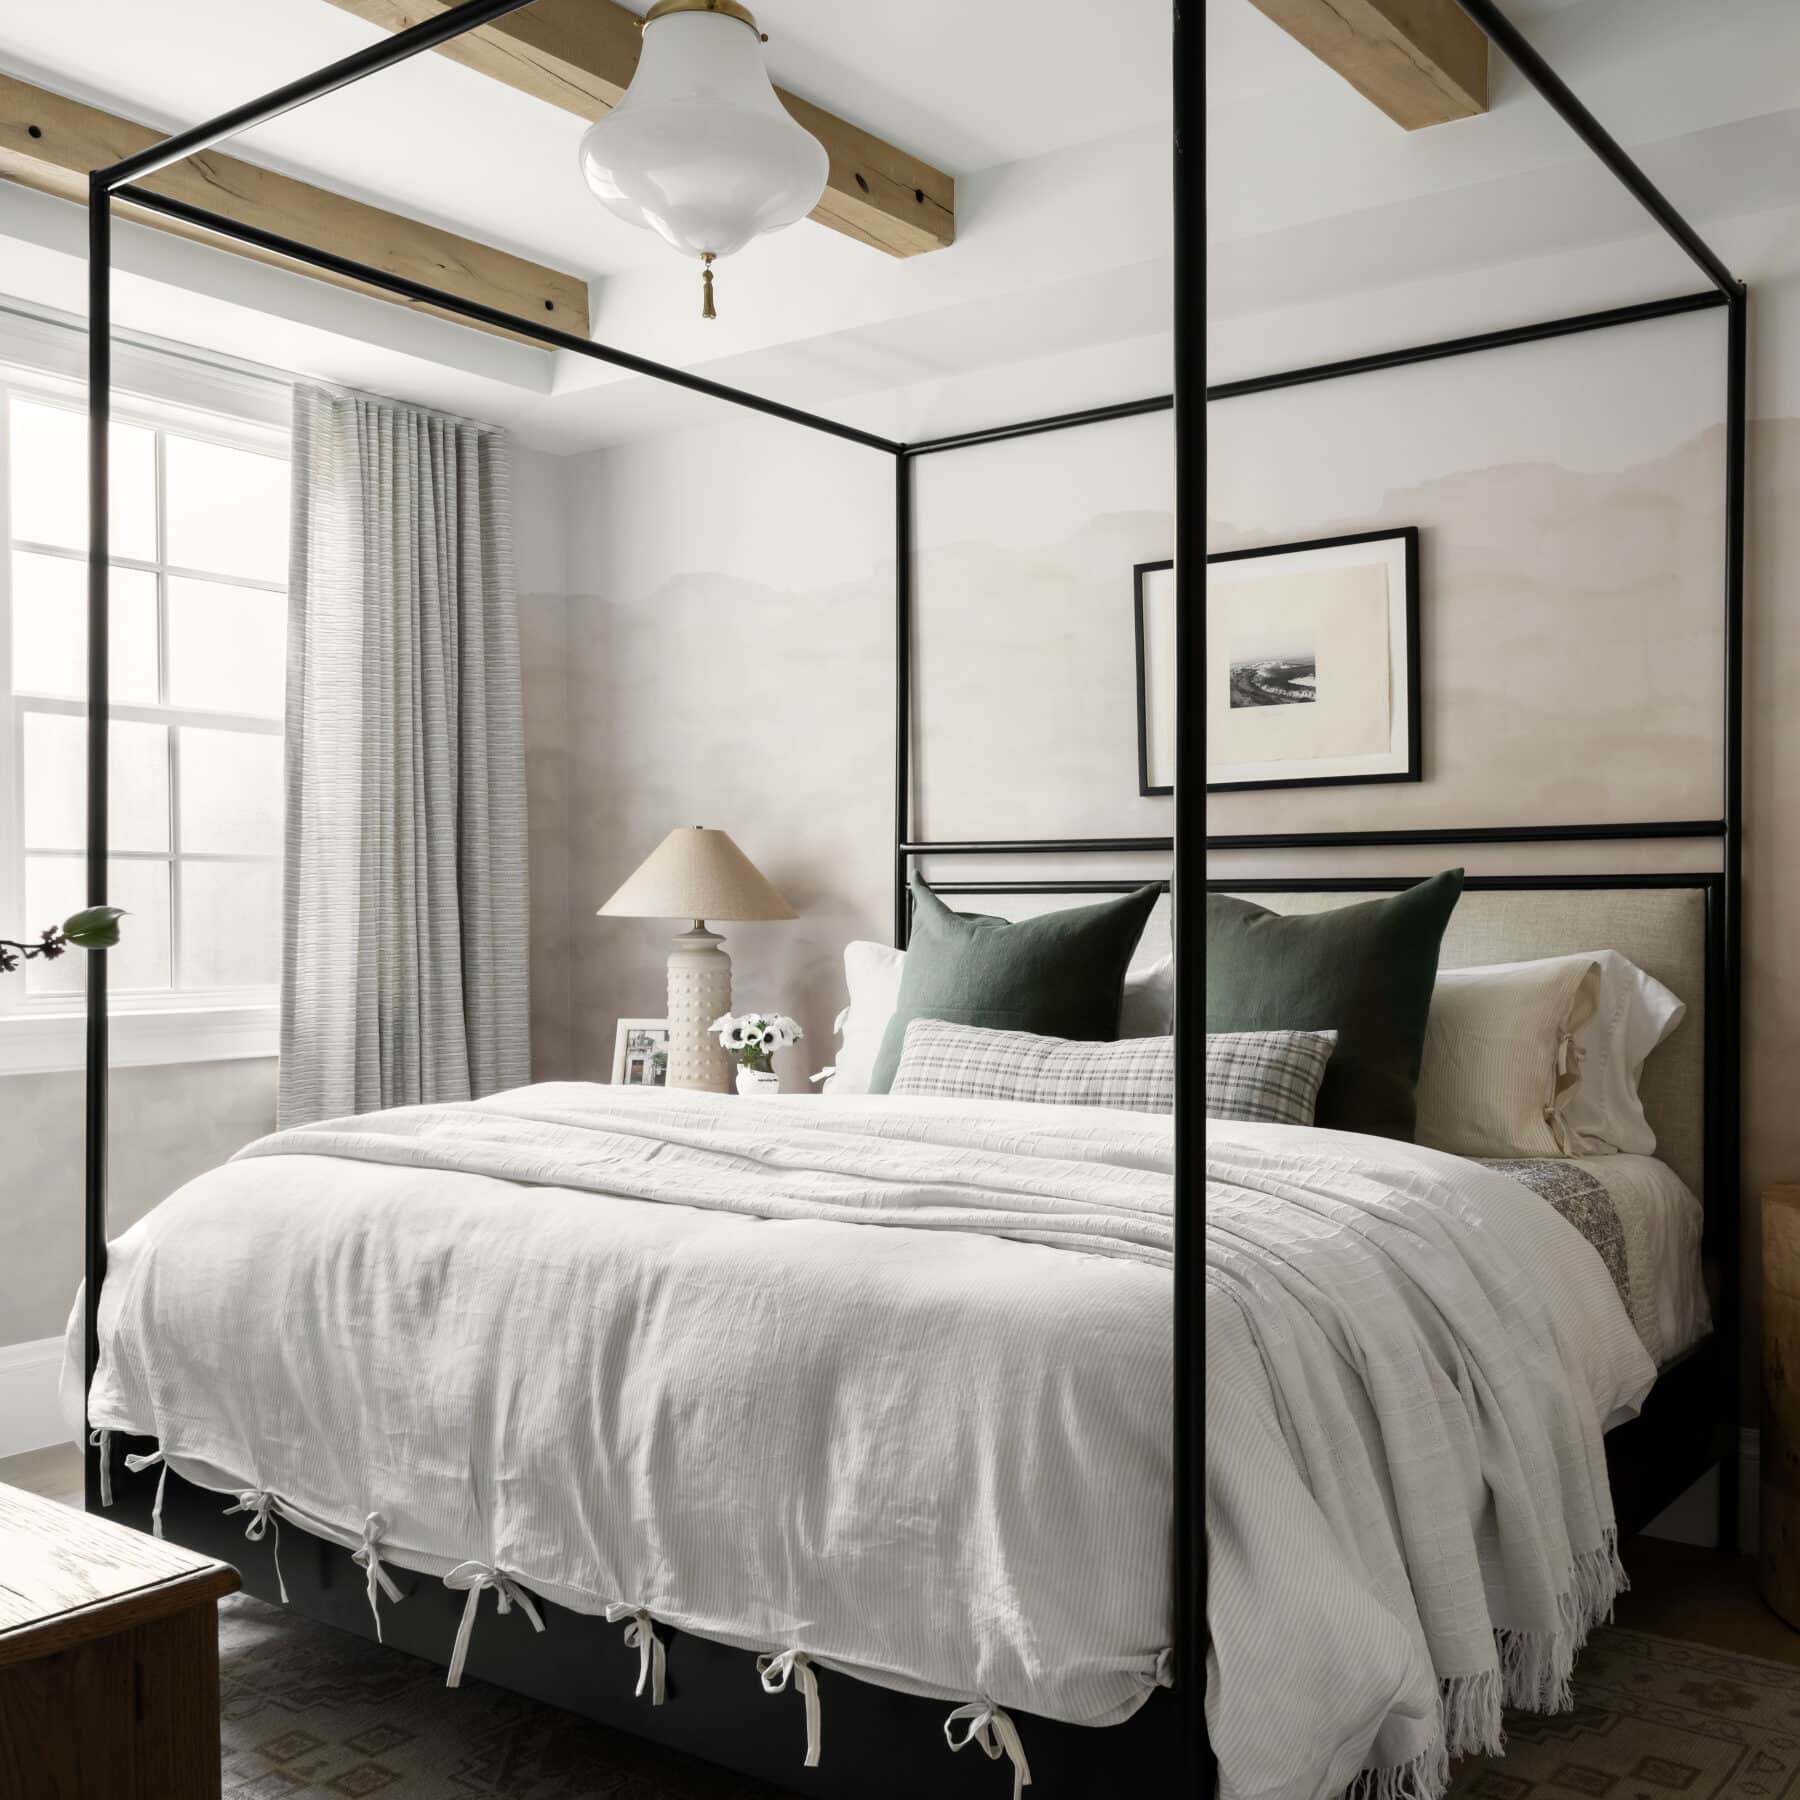
Style No. 08 | Above a Bed
A large horizontal piece of artwork is the perfect pairing for above the bed, or, similar in shape when it’s hung, a set of three or four smaller frames. If you’re sans headboard, consider hanging art to act as one. Height is important here. Hang it high enough that you won’t damage the hanging from leaning on or stacking your bed pillows, and low enough that it visually replaces a headboard. If you’re hanging it above a headboard, make sure you have enough breathing room between the top of the art and the ceiling. We recommend at least 8 to 10 inches.


Style No. 09 | Stacking a Duo
Everything is better in pairs but the same rule for humans applies to art: when pairing up, they have to relate to each other. An art print divided in half with the same frame is an obvious pairing, but if you’re wanting to group two together that didn’t necessarily come together, there are a few things to keep in mind. When your “gallery” tops out at two, you have to ensure that the duo have a lot in common. We suggest keeping at least two of the elements identical: frame shape and color, color palette of the art inside the frame, vertical or horizontal orientation.


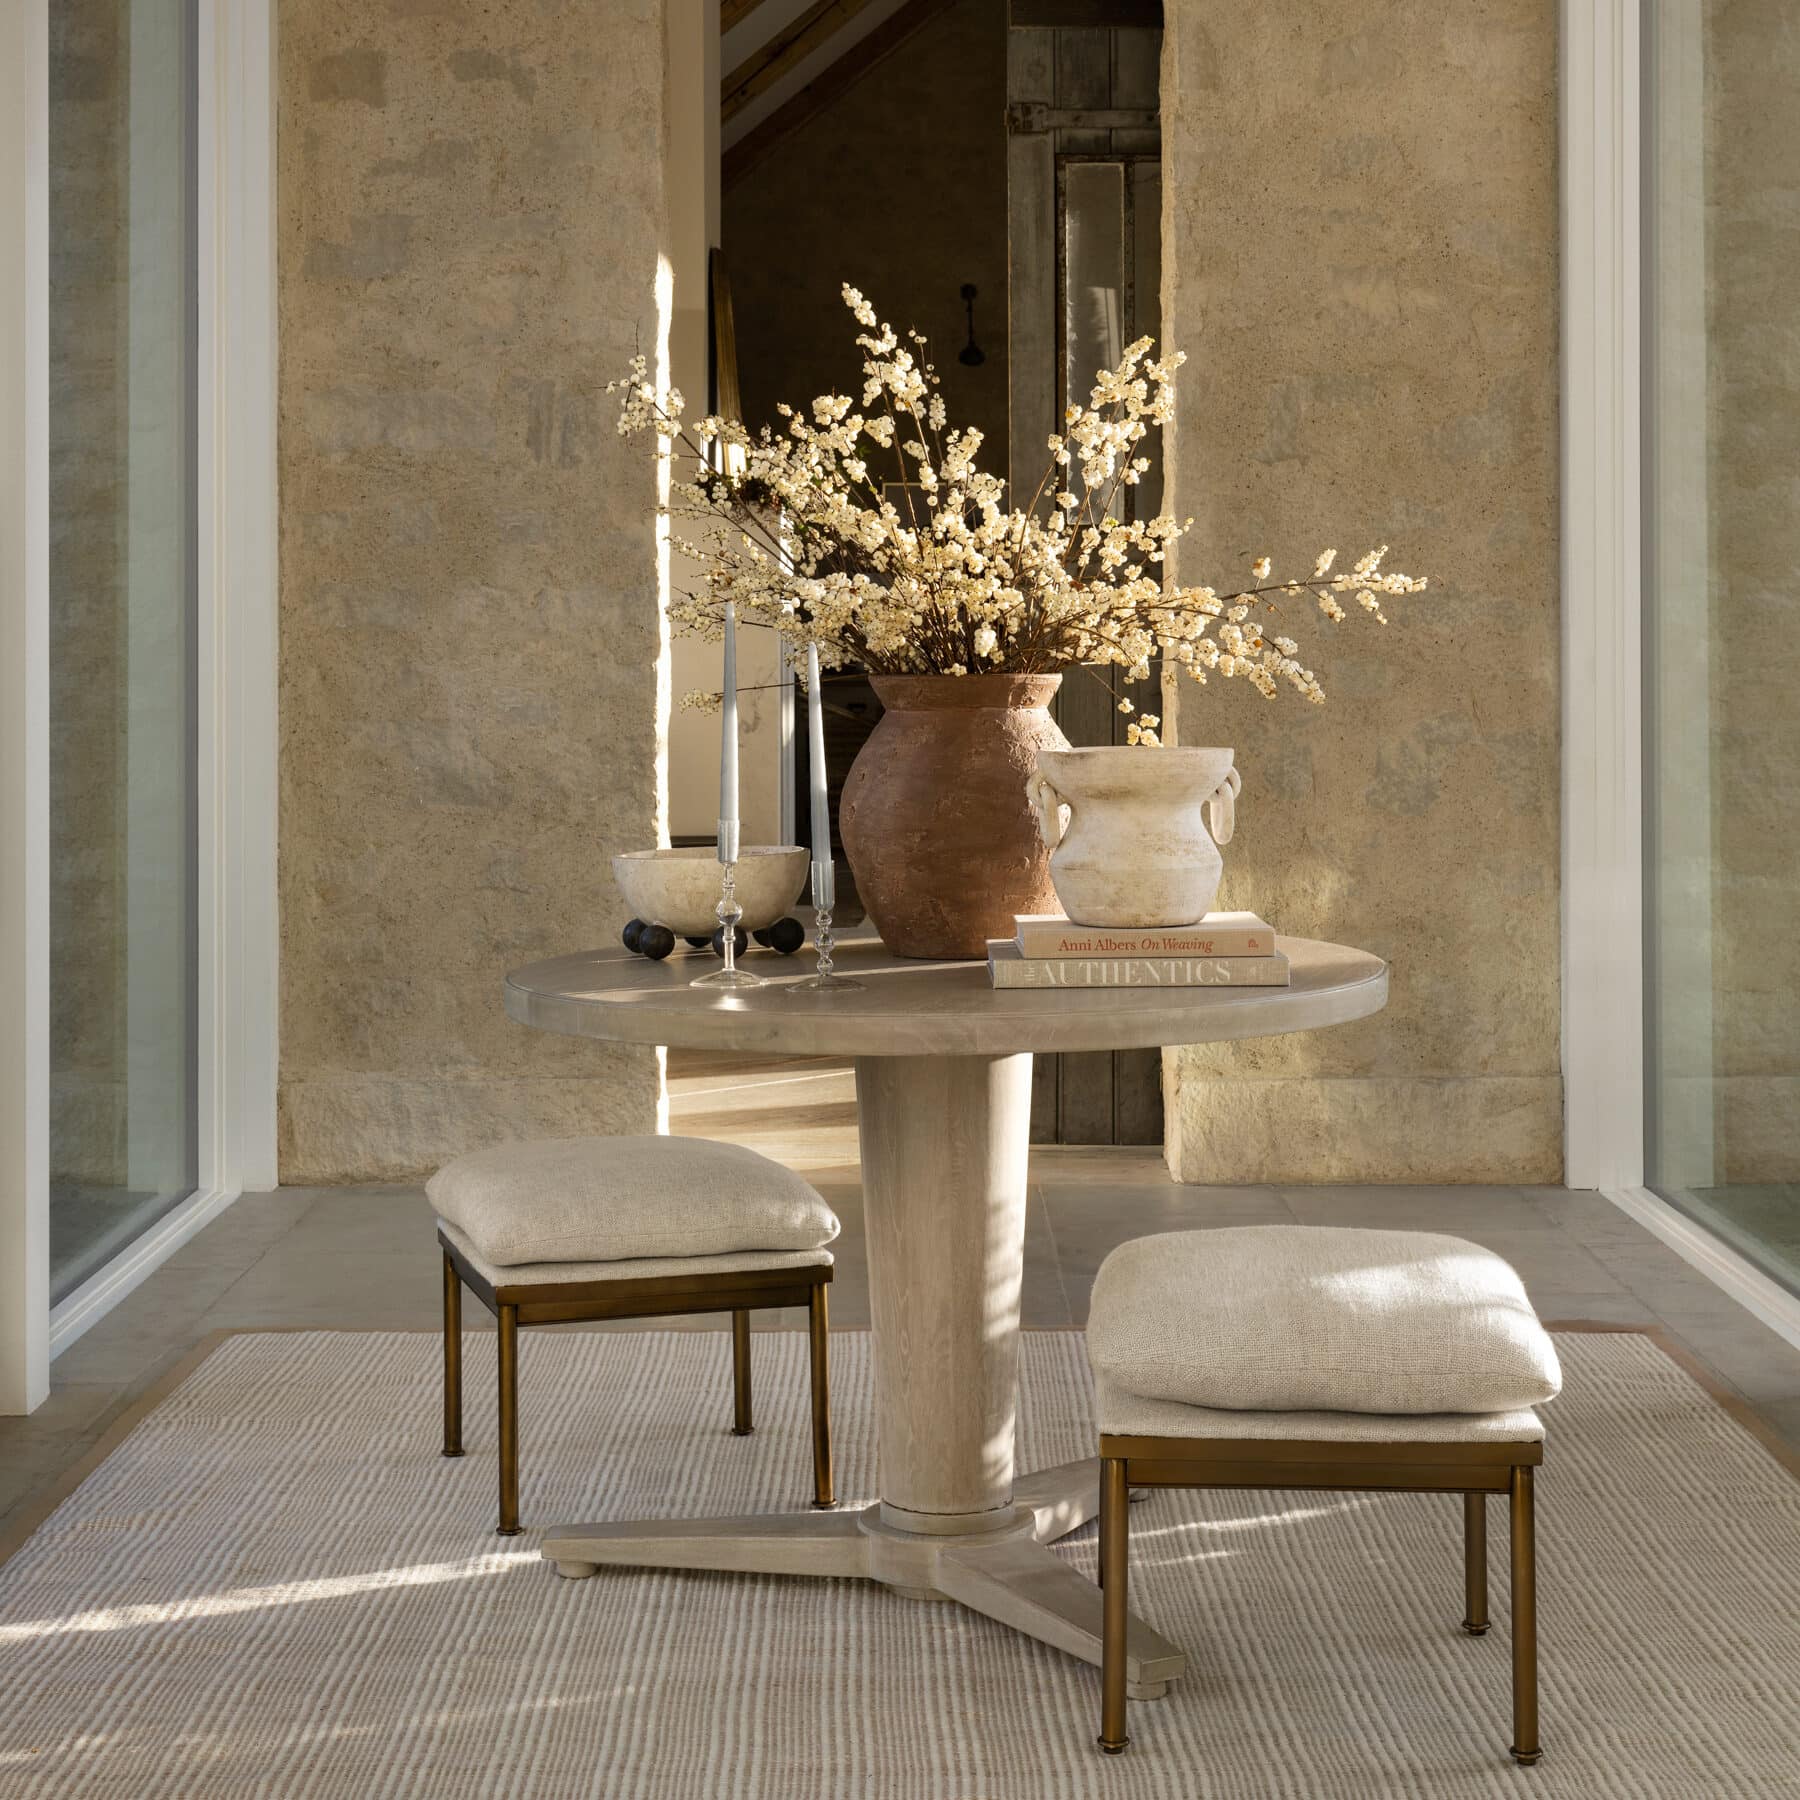
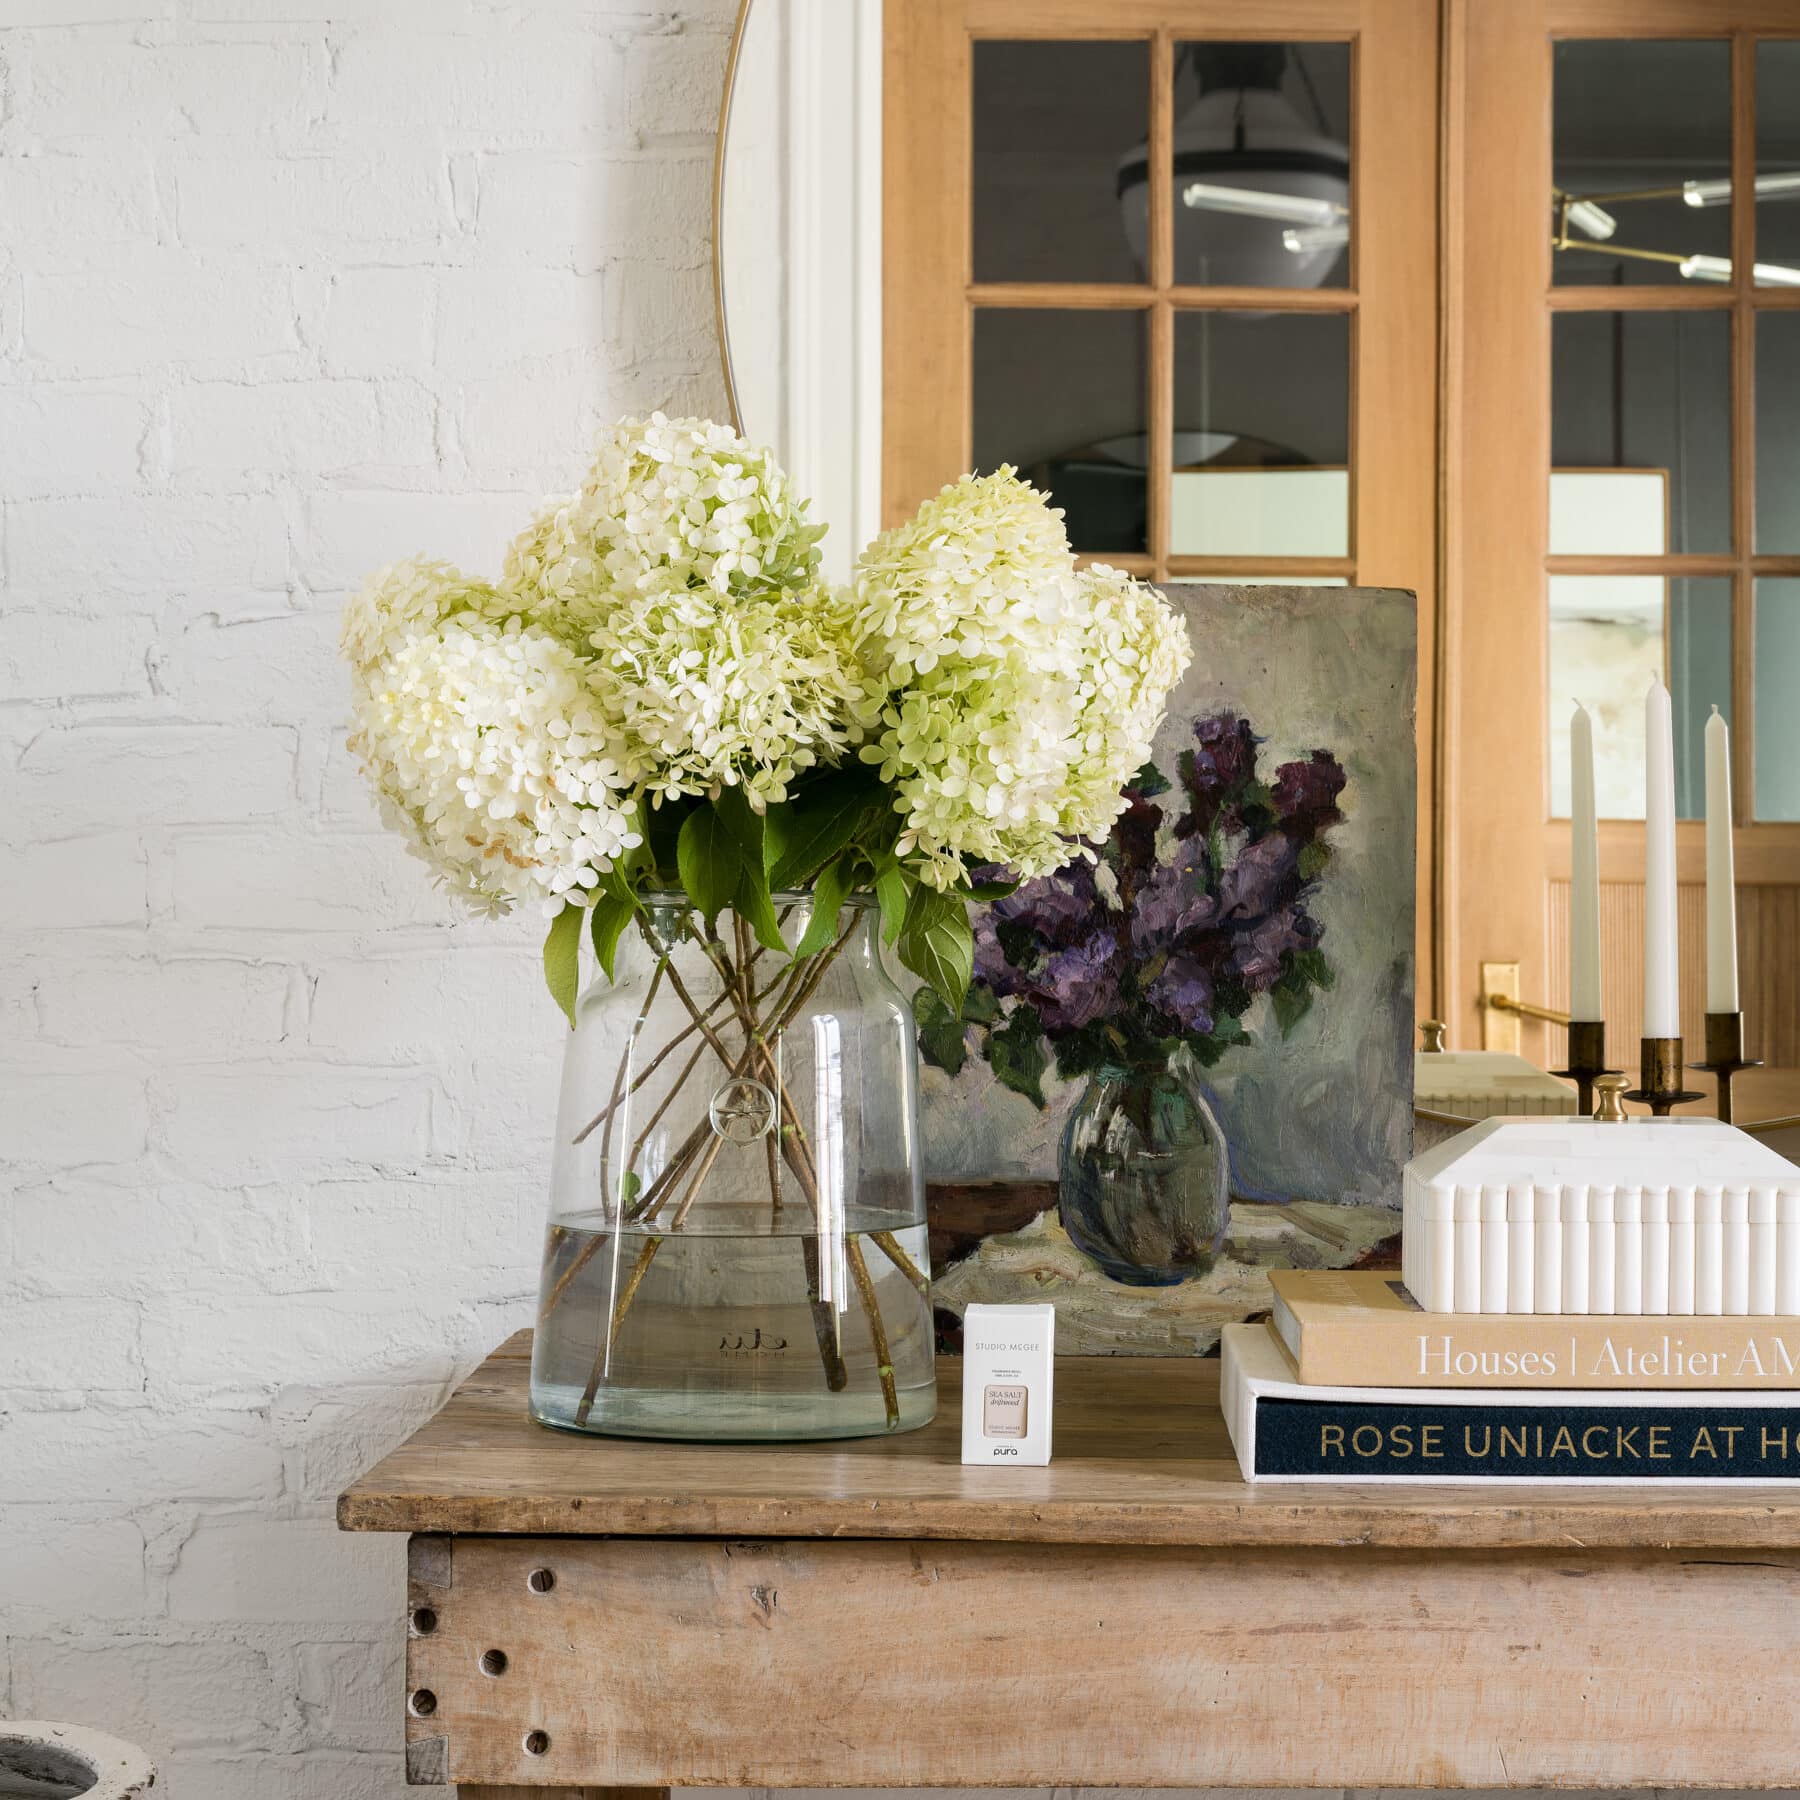
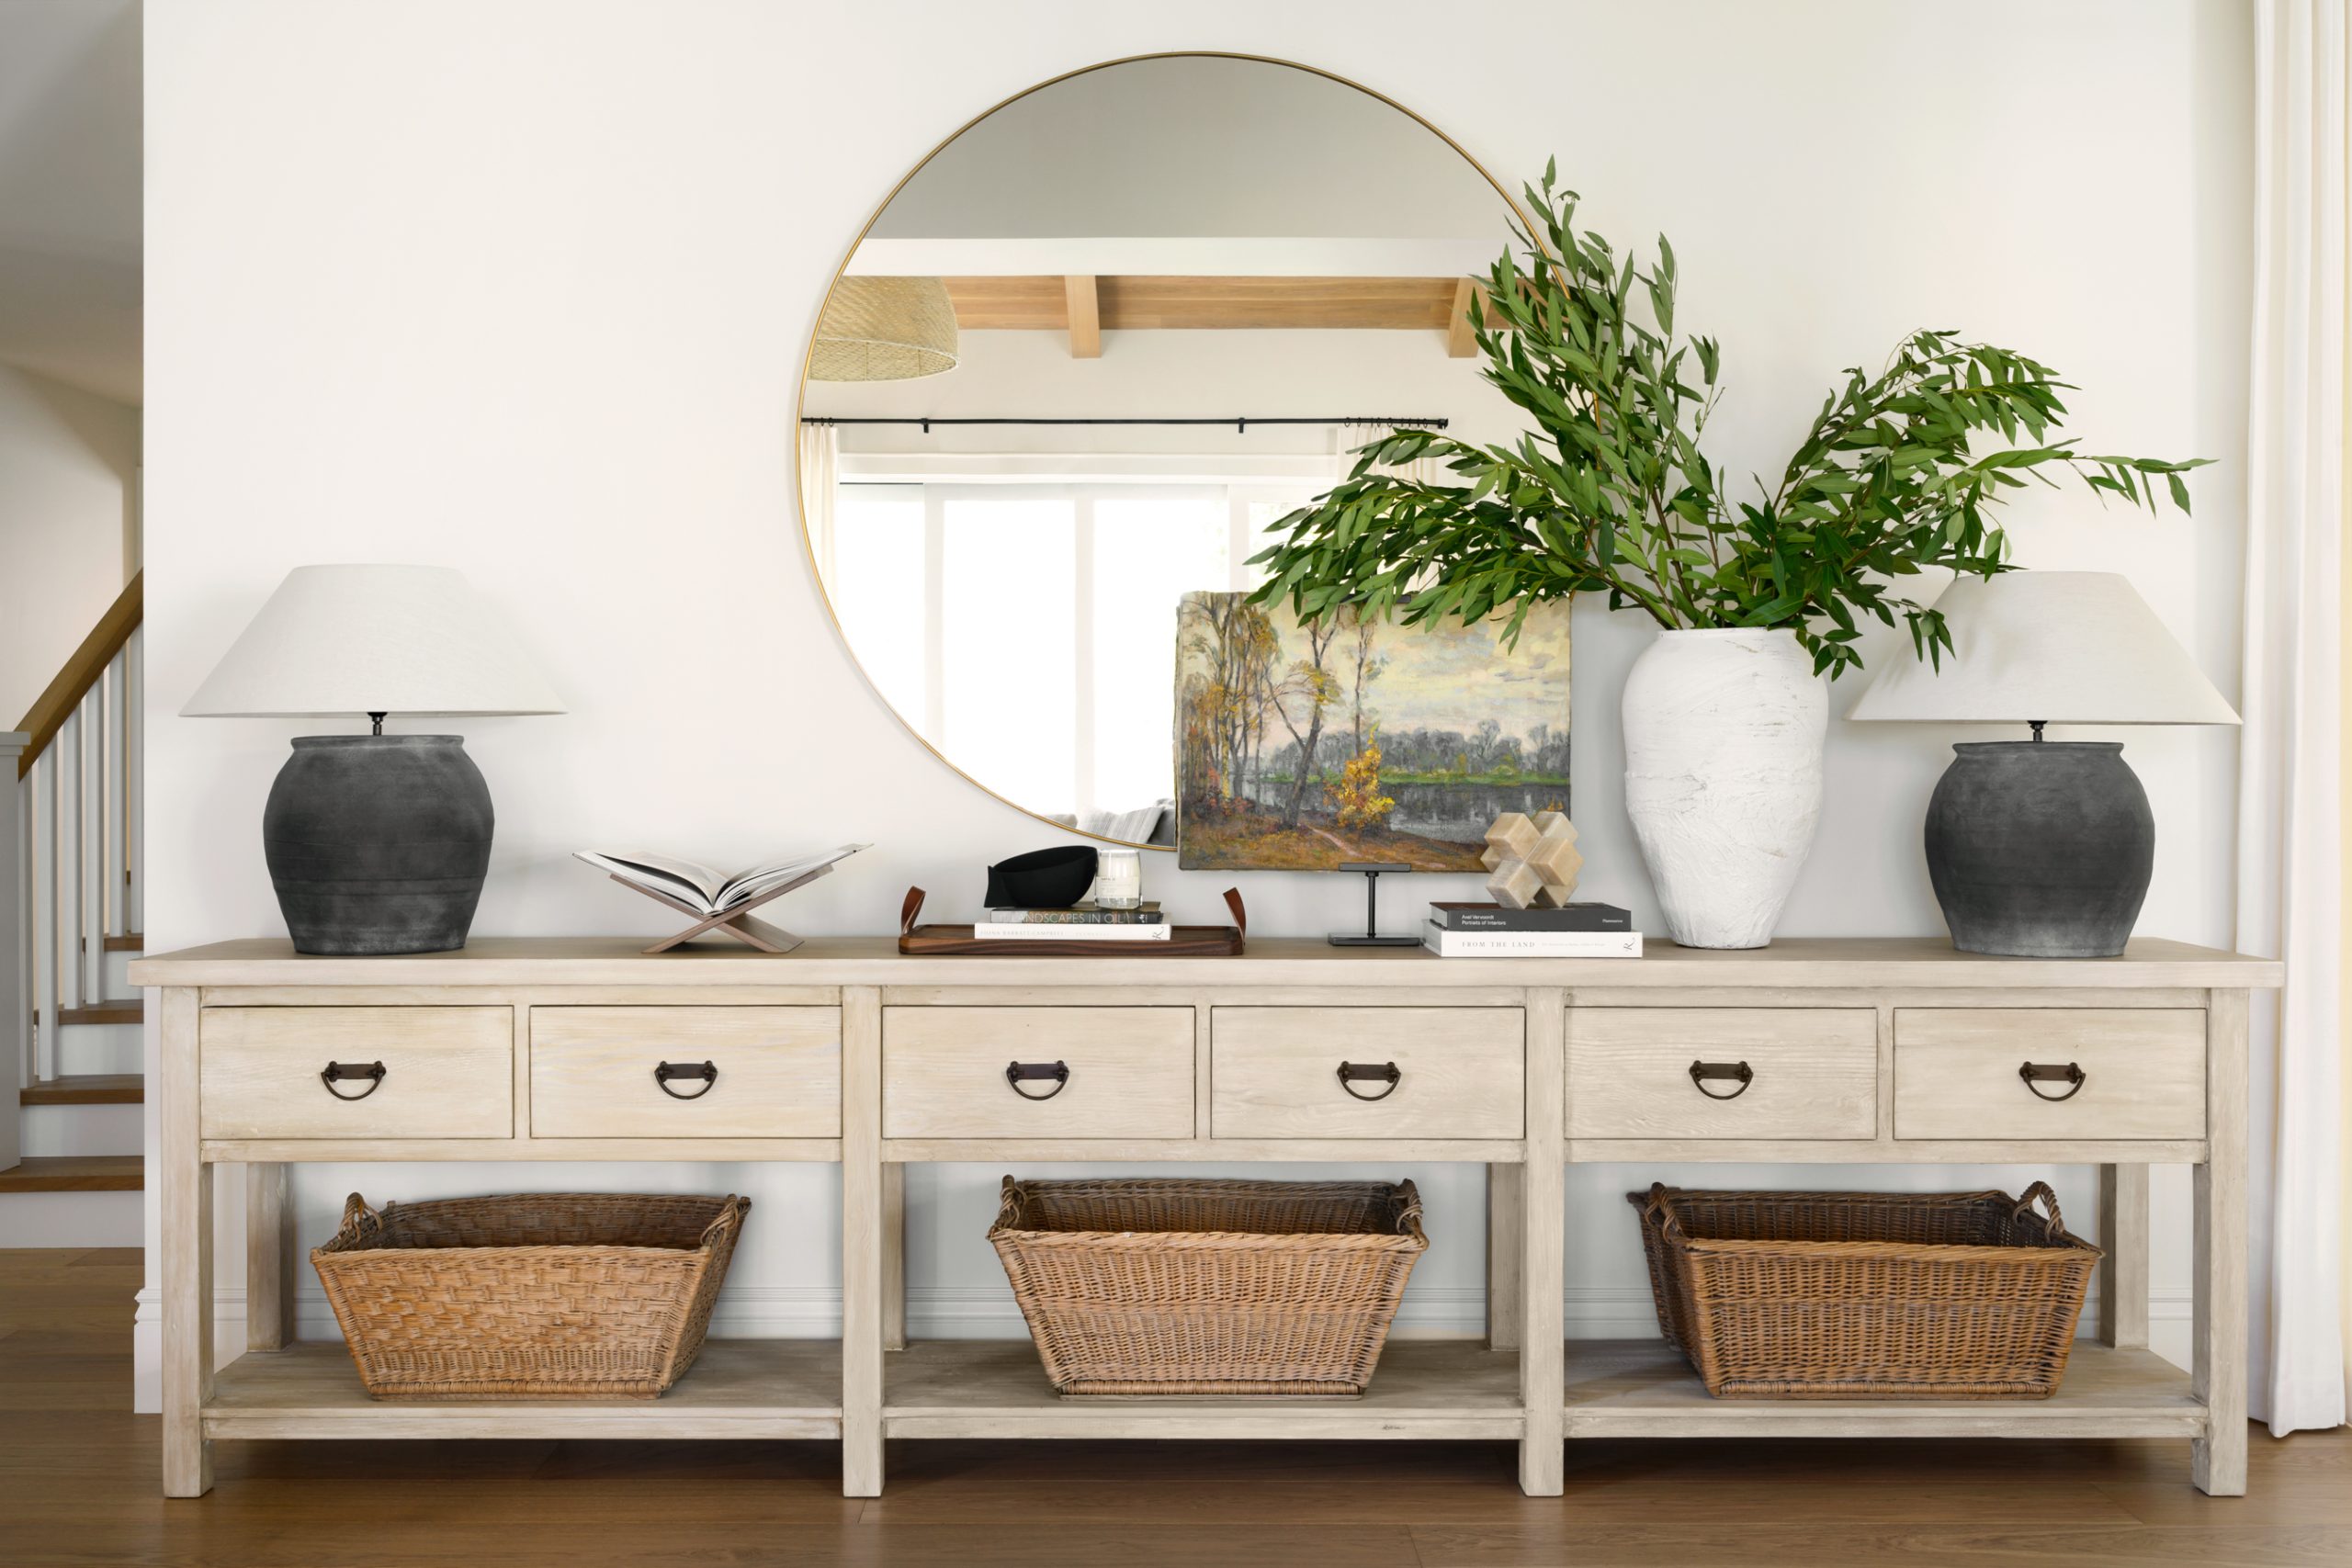
Style No. 10 | A Leaning Vignette
There’s a certain skill that comes with leaning artwork in order to make it look as if you didn’t forget to hang it. While it’s a cool and casual feel, it also allows for you to easily switch out and mix-and-match art pieces if you’re the type of person that enjoys doing that. If so, start with a star piece and work out from there. Layer in different color palettes, different shapes and sizes, and then add some accessories on the flat surface in front. Layers add depth and dimension and give a healthy dose of visual interest to your table or windowsill vignettes.


How to Style Artwork Throughout Your Home

Rock Formation

Warm Abstract

Still Life with Pears

Sketched Thoughts

Mist on the Lake

Schoolhouse

Collection of Vases

Darsey Lake Peaks

Seafoam
You May Also Like